Introduction
This document will show how to add a service to multiple clients using a scanner.
- Navigate to the Home Workspace.
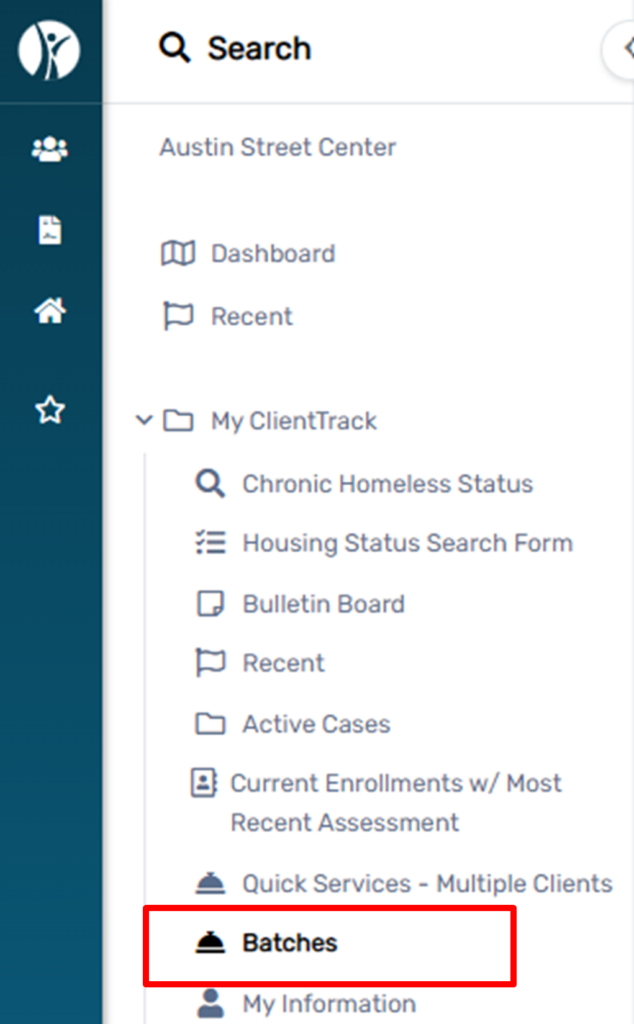
2. On the Home Workspace, select My Client Track, then Batches.
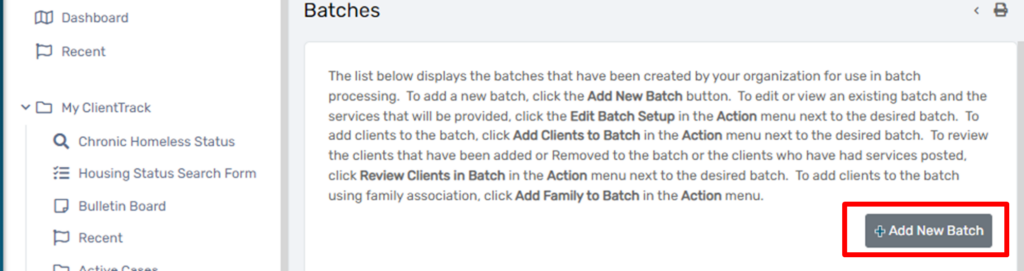
3. On the right side of the screen, select Add New Batch.
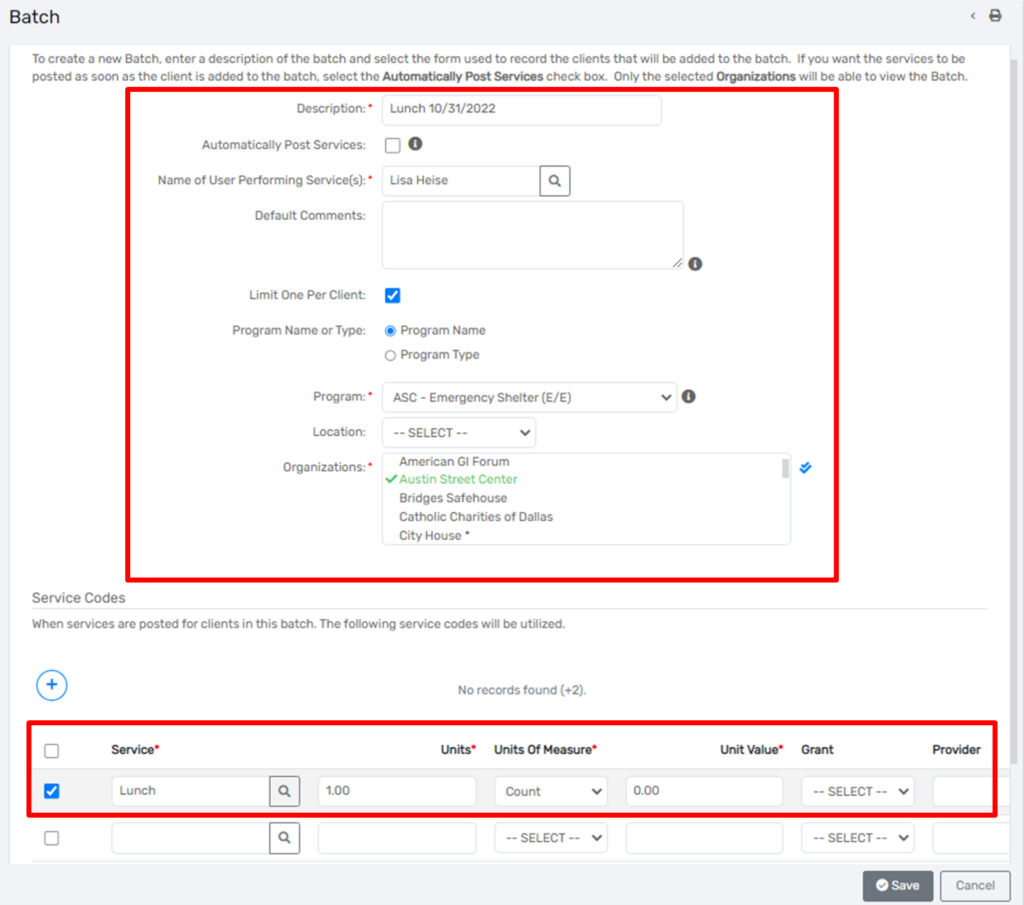
4. On the Batch set up, provide the following, bold entries are required, and select save:
- Description
- Automatically Post Services (If selected, the services will post automatically. If unselected, the services will be posted via a Post Services button.)
- Name of User
- Default Comments
- Limit One Per Client
- Program Name
- Program Type
- Program
- Location
- Organization
- Service
5. Choose the Batch and select Add Clients to Batch.
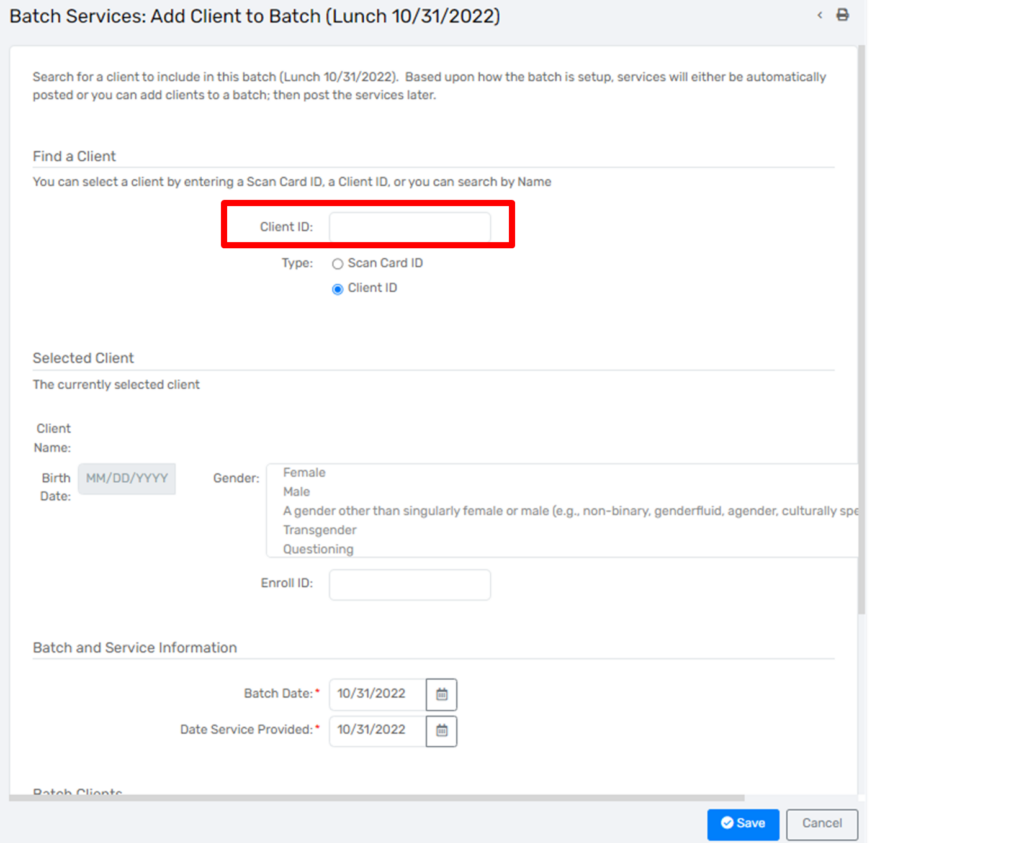
6. This screen will appear in which one would add the client information. Position your cursor in the Client ID field and scan the client’s card, then hit enter.
7. Scroll down to the Batch Clients section to see all the services that have been scanned.
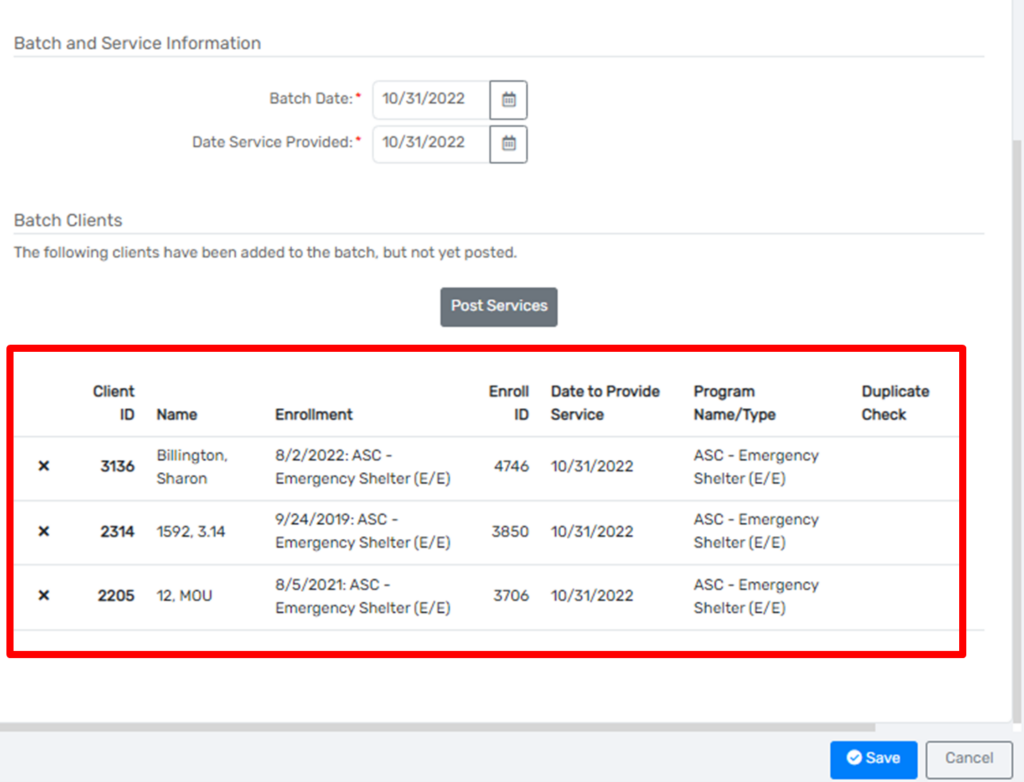
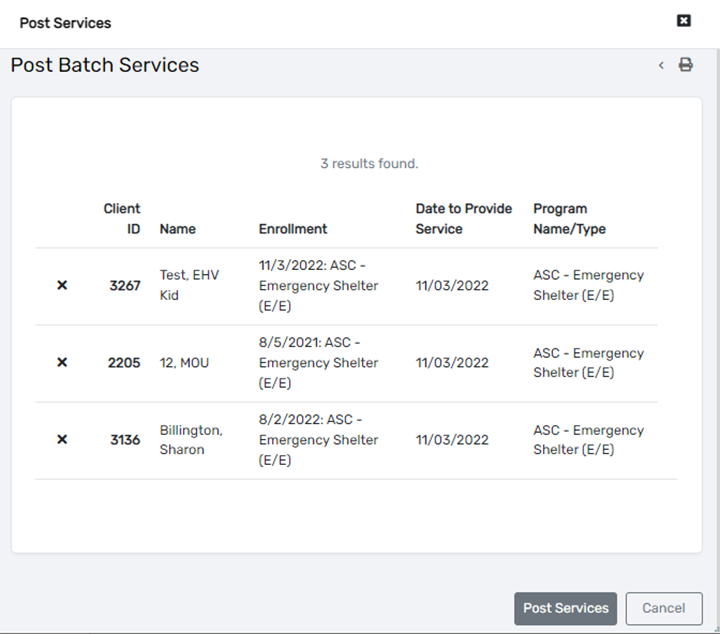
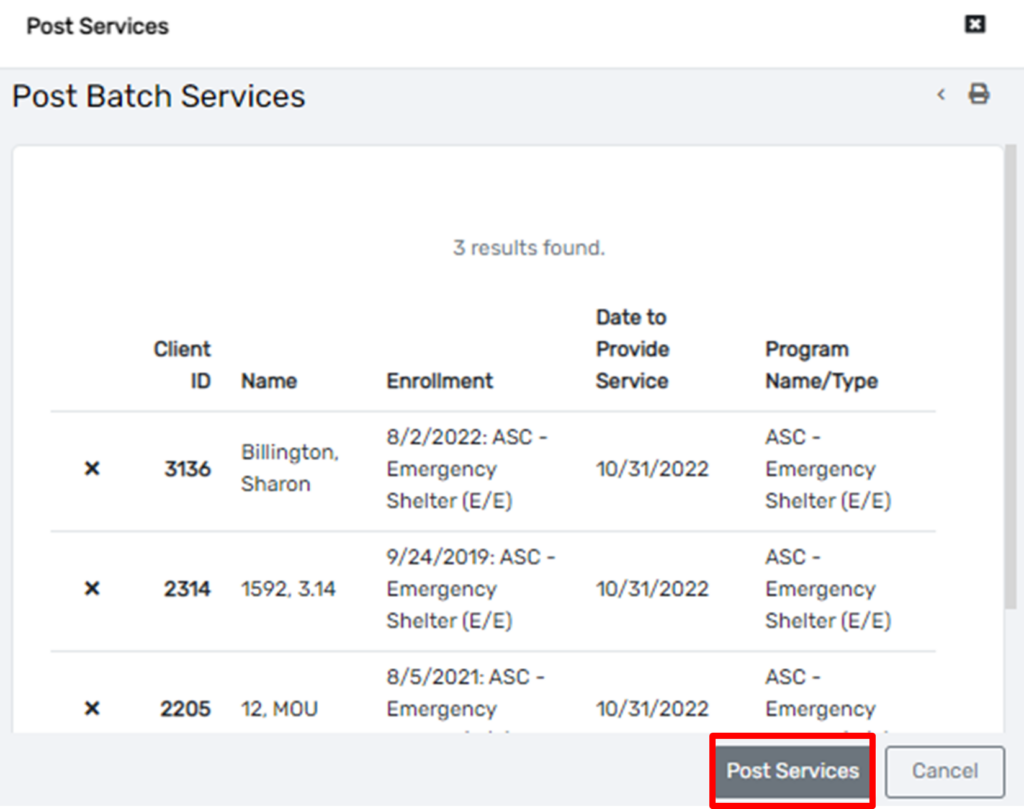
8. Once all the services have been added and reviewed, select Post Services.
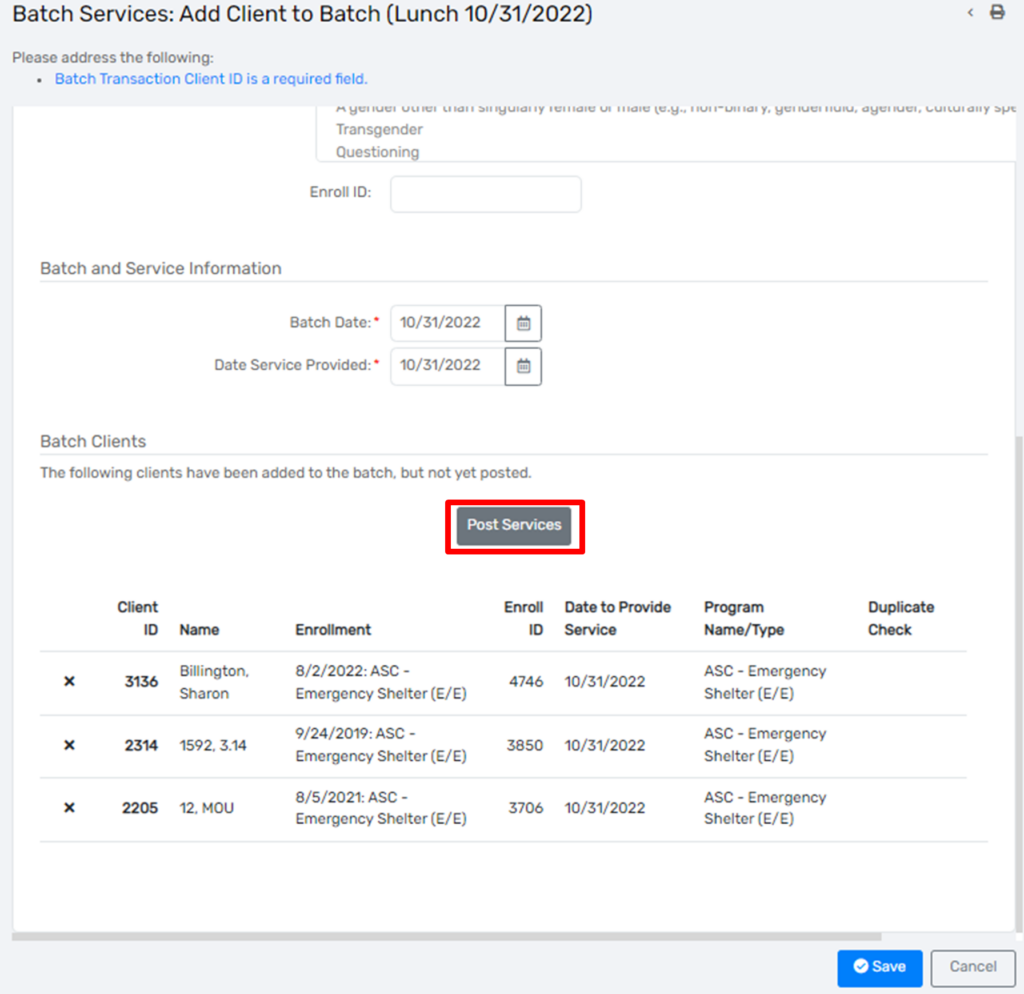
9. On the new window that appears, select Post Services.
Duplicate Clients and No Enrollments #
When reviewing the batch, you may come across the following situations:
No Open Enrollment (the client is not enrolled in the program) or Duplicate
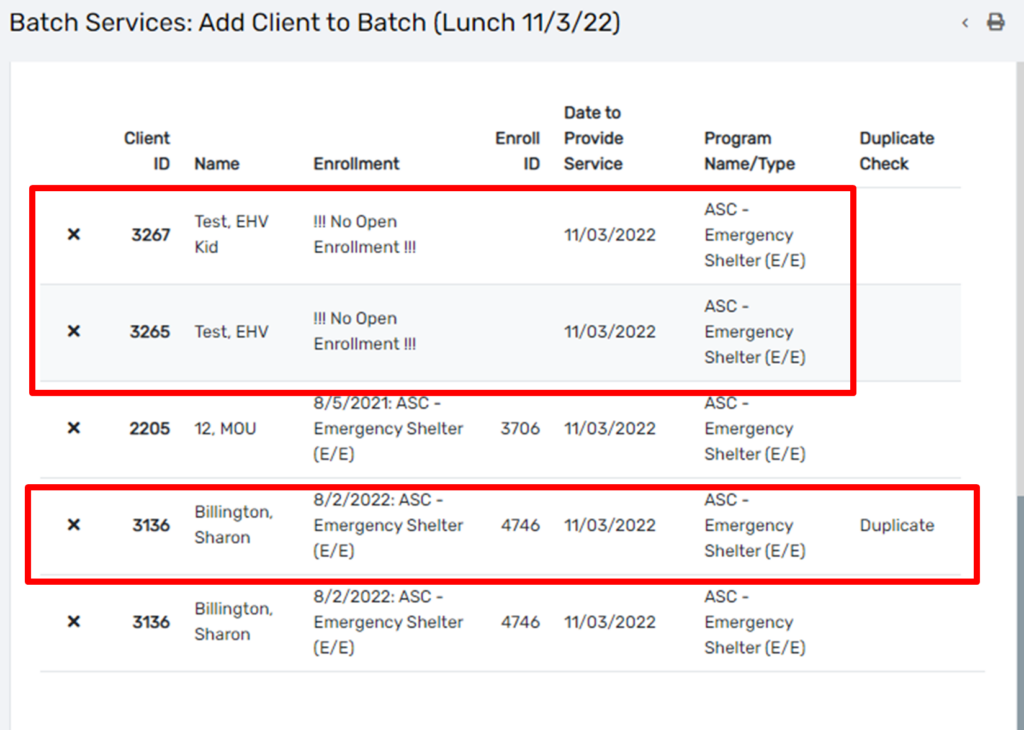
For the No Enrollment issue, you may enroll the client and reload the batch, or delete the entry by selecting the X on the left.
For the Duplicate issue, select the X on left to remove the entry.
After deleting one of the No Enrollments and the Duplicate, below is the posting services screen.