Documents are uploaded – While your client is enrolled in CAS, you will need to update their documentation by uploading documents to CAS Document Check. As a best practice you should also complete an update assessment any time you upload a document outside of the entry workflow.
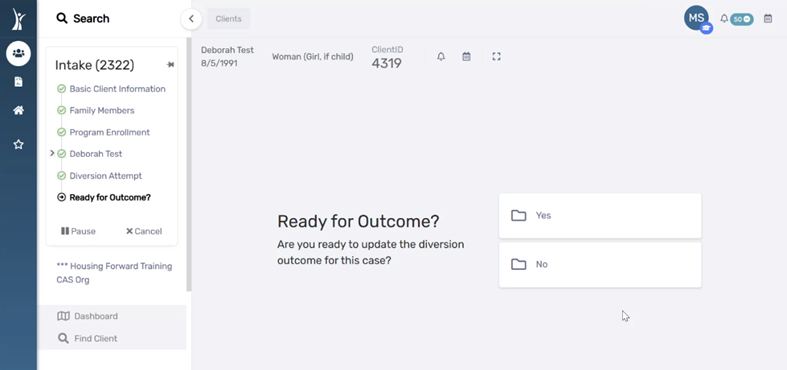
The Outcome of a diversion conversation or attempt changes.
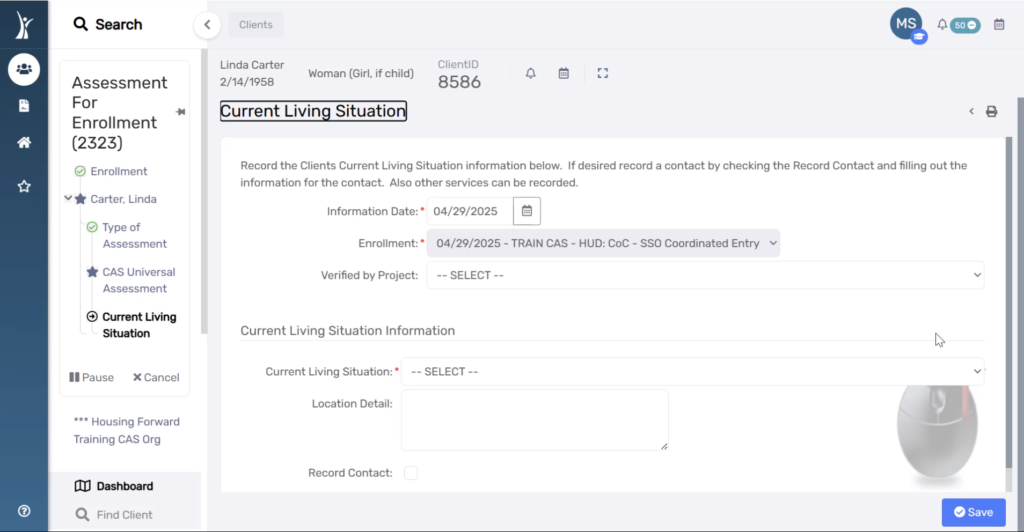
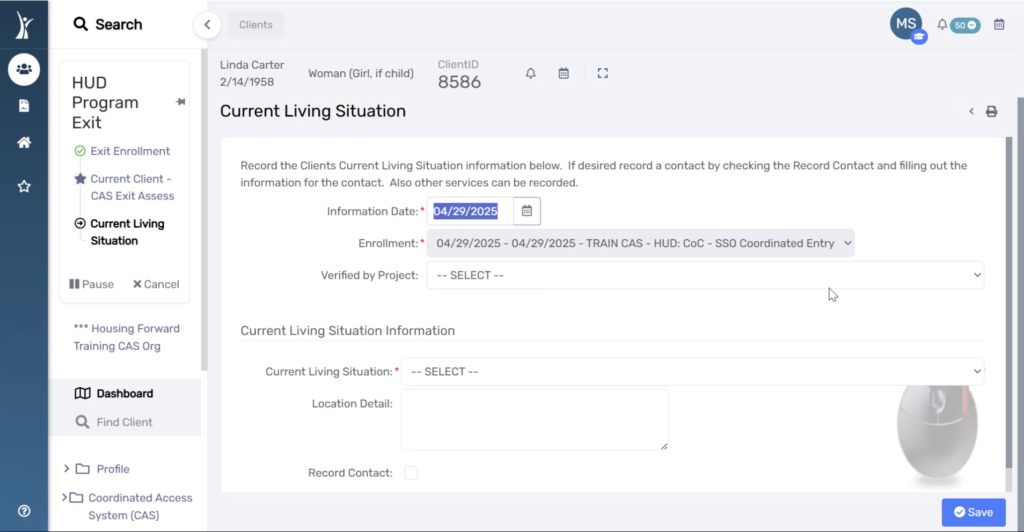
Current Living Situation is a required page of the Update Assessment. The following is an excerpt from the HMIS Data Standards produced by HUD:
“Contacts: CE projects are expected to record every direct contact made with each client in the HMIS via data element 4.12, Current Living Situation. A contact is defined as an interaction between a worker and a client designed to engage the client. Contacts include activities such as a conversation between the street outreach worker and the client about the client’s well-being or needs, an office visit to discuss their housing plan, or a referral to another community service. A Current Living Situation (4.12) must be recorded anytime a client is met, including when a CE Assessment (4.19) or CE Event (4.20) is recorded on the same day.
On occasion, it is expected that a Continuum project that does not participate in HMIS by collecting and entering client-level data will be a source of information about the whereabouts of a client. The Current Living Situation data element will be one factor in reporting to determine whether a CE client is still actively seeking assistance. As a result, it may be necessary for the CE project to record that element on behalf of a nonparticipating project. In those cases, the CE project will use the field ‘Living Situation verified by’ to document the Project Name of the project that reported an updated status for the client during case conferencing.”
10. Answer all questions on this page using information from any Triage, Intake, and HPS conversations with the client.
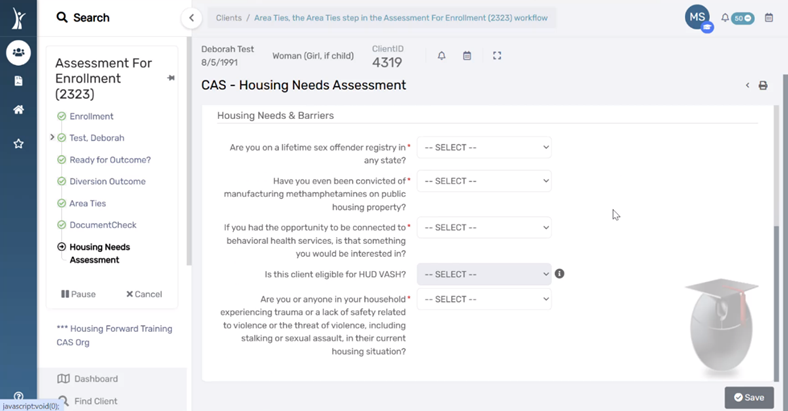
Housing Needs & Barriers
Are you on a lifetime sex offender registery in any state?
Have you even been convicted of manufacturing methamphetamines on public housing property?
If you had the opportunity to be connected to behavioral health services, is that something you would be interested in?
Is this client eligible for HUD VASH? *This question will only be editable for veteran service providers.
Are you or anyone in your household experiencing trauma or a lack of safety related to violence or the threat of violence, including stalking or sexual assault, in their current housing situation?
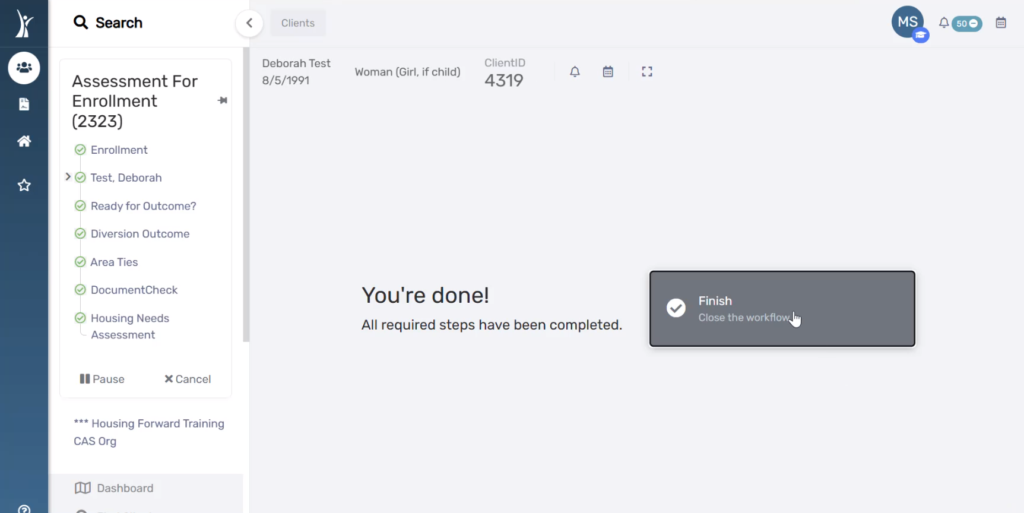
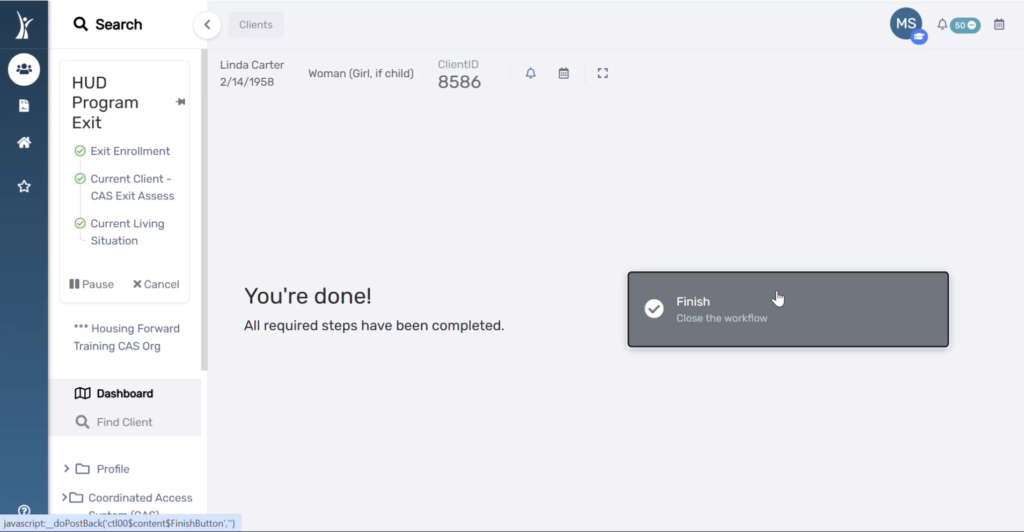
11. Click the Finish button to close the workflow.
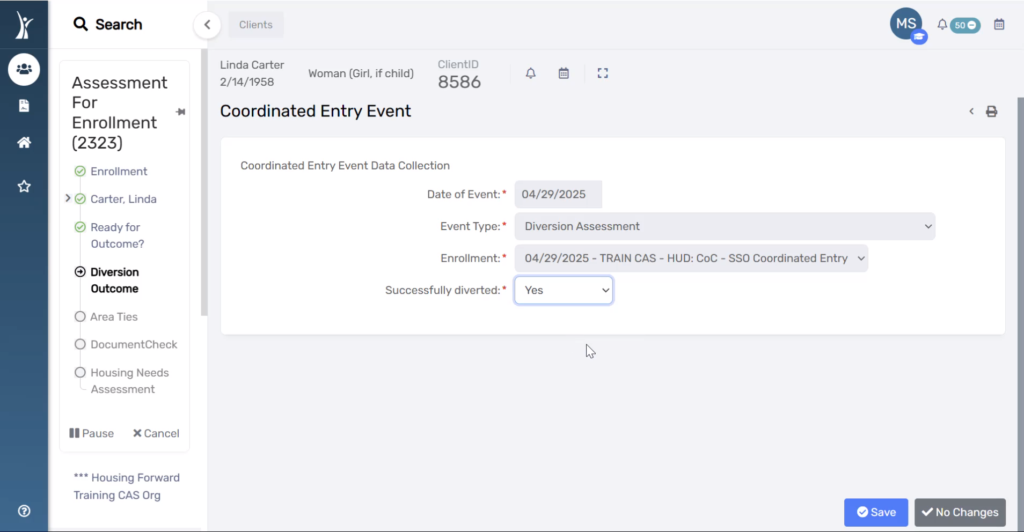
CAS Exit Assessment Workflow for Successful Diversion #
You will be immediately prompted to complete a CAS Exit assessment if you selected “Yes” to “Successfully Diverted” in Step 6, meaning the household was successfully diverted and no longer needs CAS services.
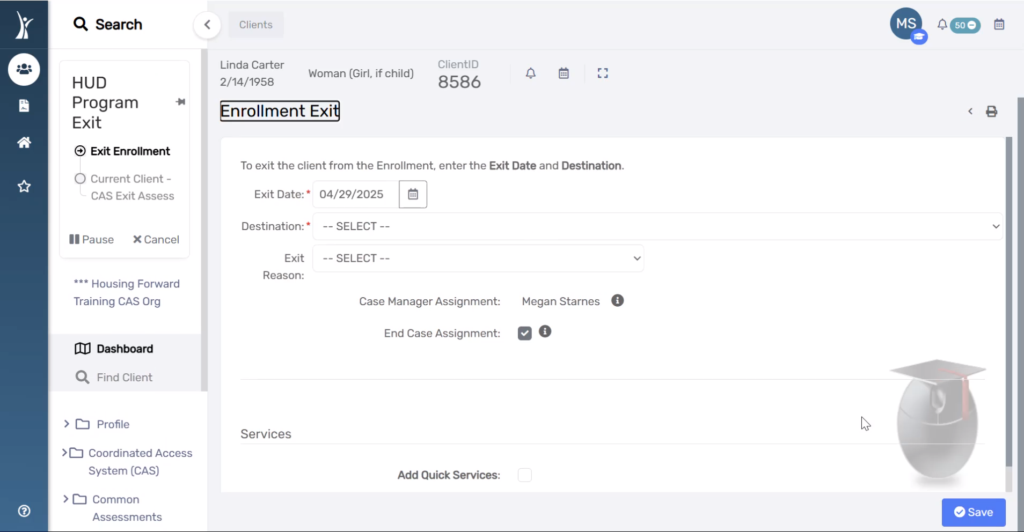
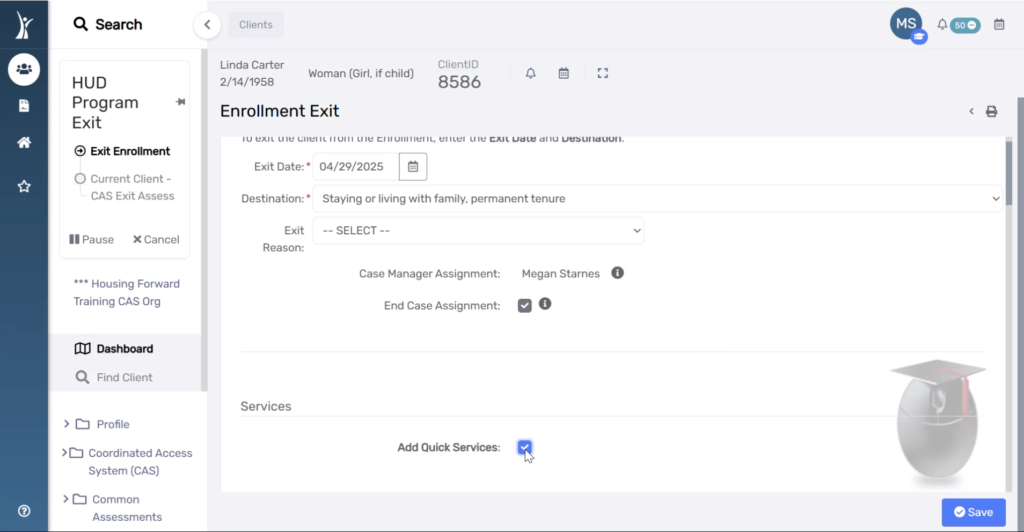
Exit Assessment & Diversion Services Page
1. Enter the appropriate Exit Destination.
2. Check the box to End Case Assignment. This removes the neighbor from your Active CAS Caseload
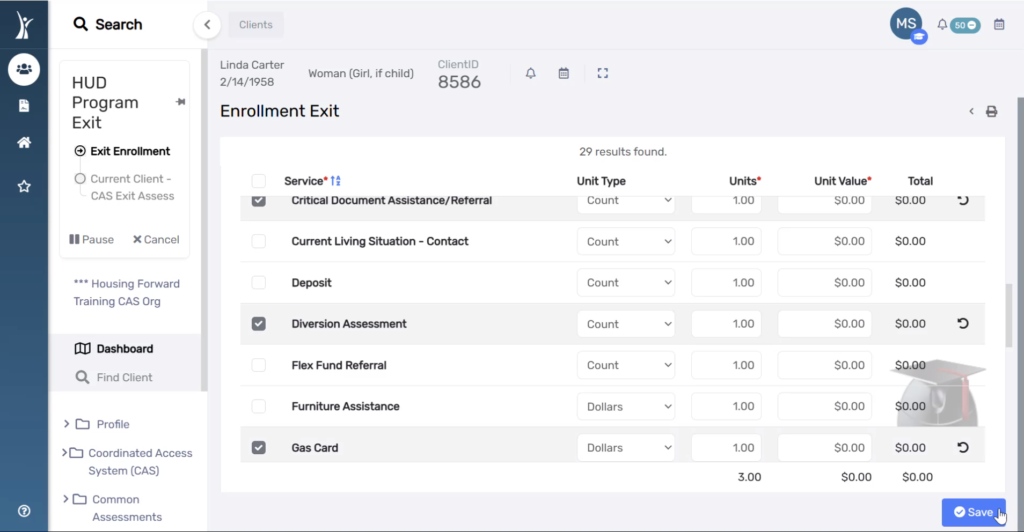
3. Check the box to Add Quick Services. A service is required for CAS Exits resulting in a successful diversion.
4. Select any service provided that contributed to this successful diversion. Note the option for “Successful Diversion Other” if you do not see the specific service you provided in the list.
If you choose “Successful Diversion Other” as the service provided, please record a Case Note detailing the service that led to successful diversion.
Fields on this page default and do not need to edited, except in the case of back-data entry. Select Save to continue to the next page of the workflow.
You will see this field again in the workflow to record the data in association with the Exit Assessment. Choose the living situation that corresponds to their Exit Destination.