Introduction #
This guide serves a purpose of how to run a Point in Time Report as a Summary Report, Scheduled Report, and Detailed Schedule Report. The reports are used for submission of your Emergency Shelter and Transitional Housing program’s data on the night of the Point In Time count.
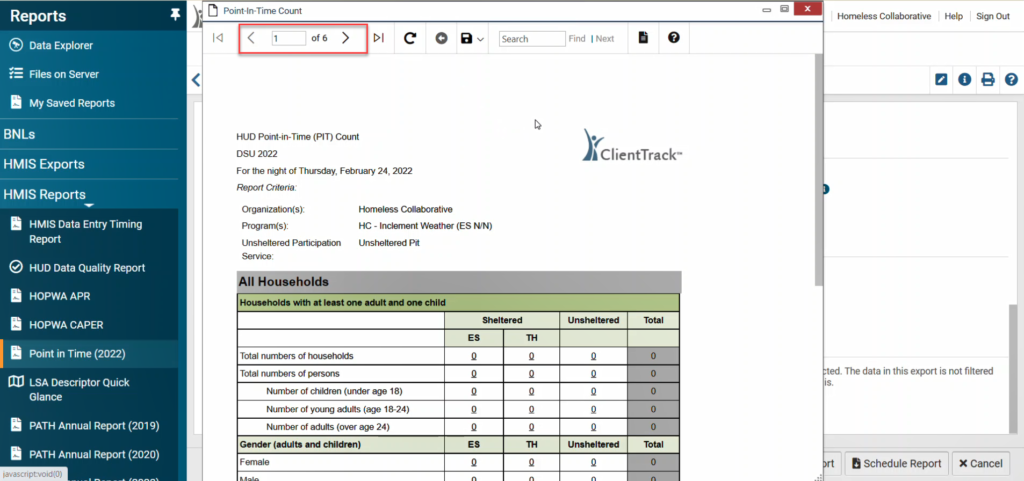
The report will populate into 8 tables:
- Households with at least one adult and one child
- Households without children
- Households with only children (under age 18)
- Veteran households with at least one adult and one child
- Veteran household without children
- Unaccompanied youth households
- Parenting youth households
- Additional populations
Entering Report Settings #
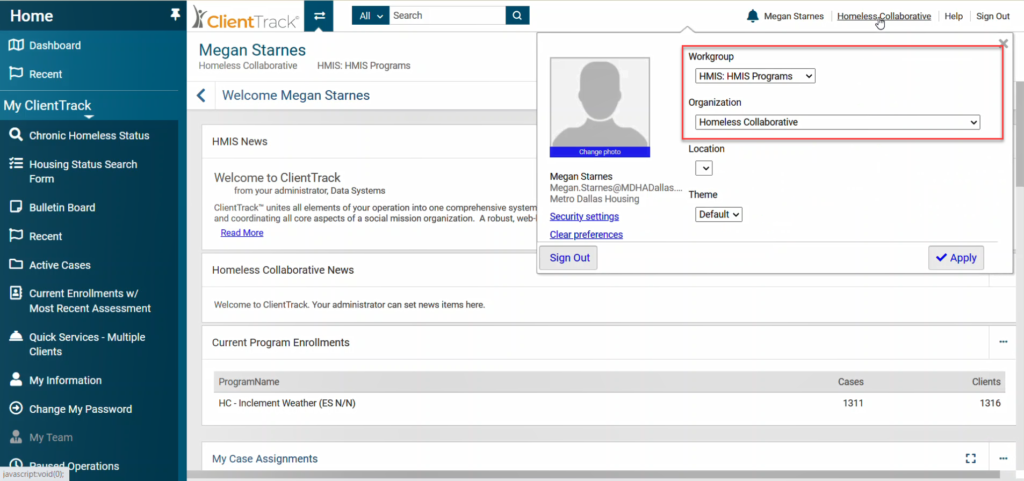
1. Log into ClientTrack and confirm your workgroup and organization.
Workgroup: HMIS Programs
Organization: [Your Agency]
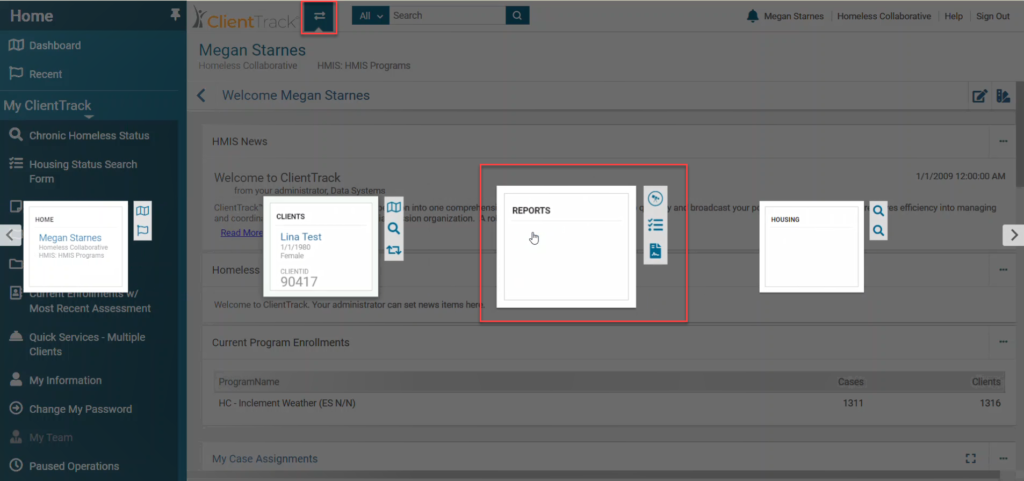
2. Navigate to your Reports Workspace.
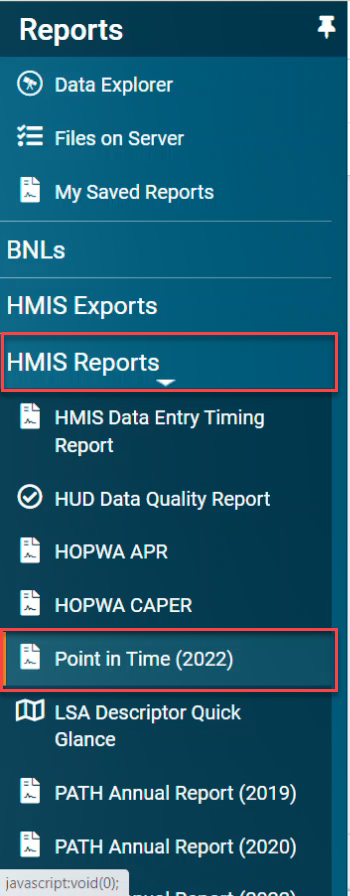
3. In the menu on the left, click HMIS Reports then select Point in Time (2023).
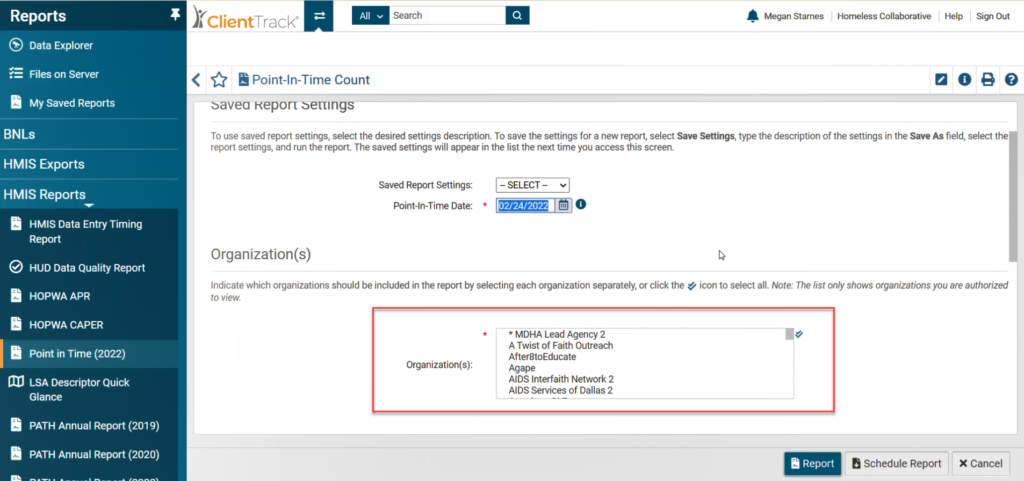
4. Enter the Point in Time Date for our community for this year’s PIT Count: January 26, 2023
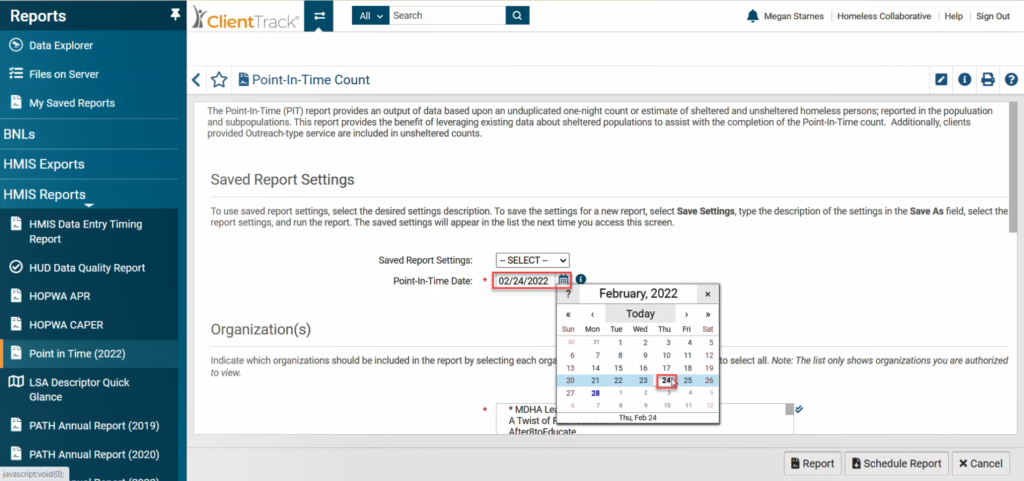
5. Your organization should be checked in the Organization(s). If you see multiple organizations here, confirm that your agency is selected.
6. Check the box for Filter by Program and select your program. Each program’s PIT report must be run individually. You should not select multiple programs for one report.
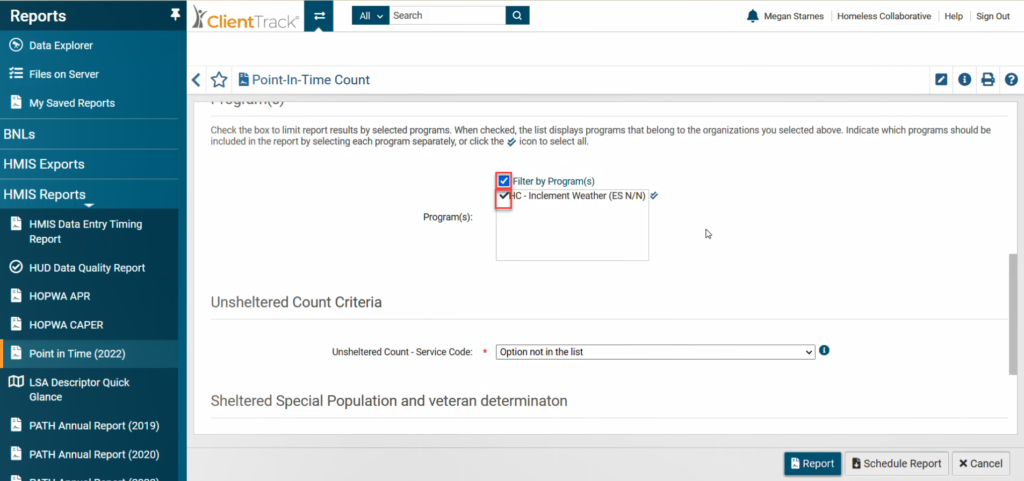
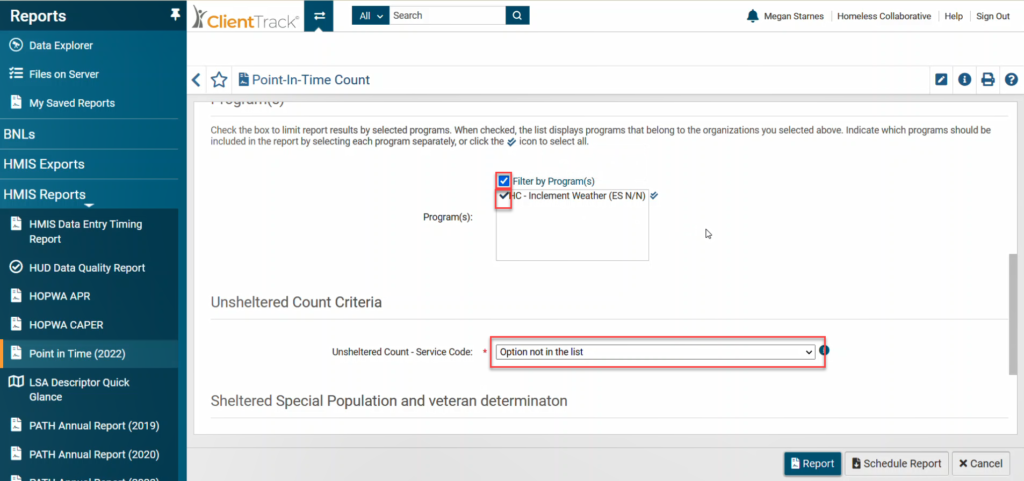
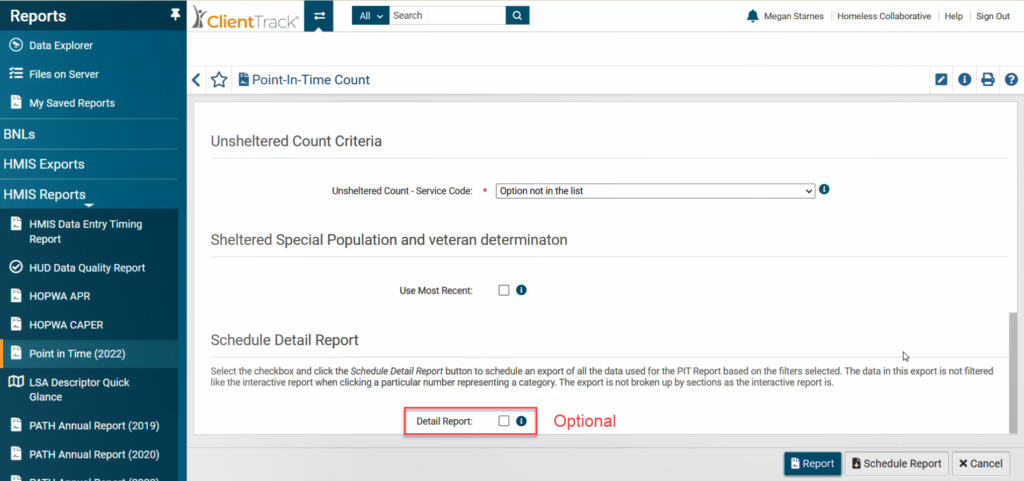
7. In the dropdown for Unsheltered Count – Service Code, confirm that PIT 2022 Report Code (Do Not Record for Clients) (1144) is selected.
8. Do NOT check the box under Sheltered Special Population and veteran determinations. Leave this box empty.
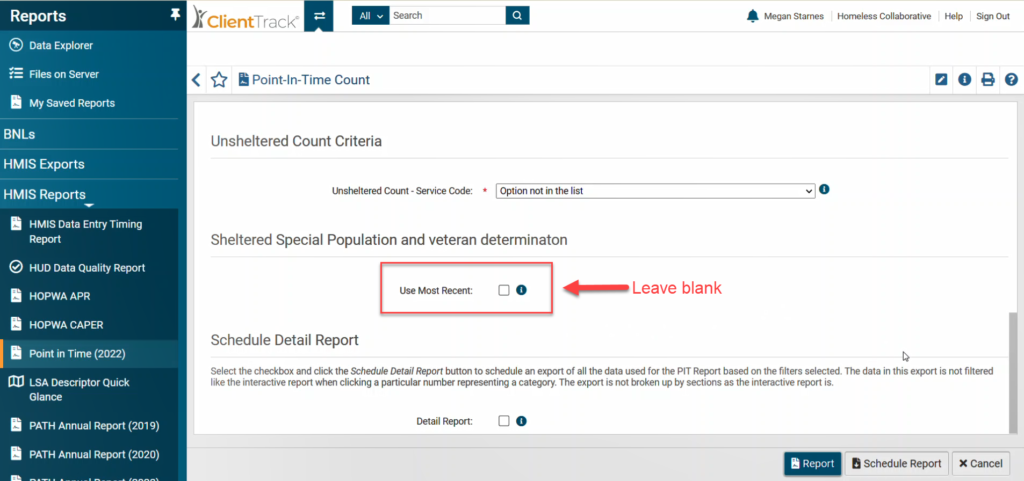
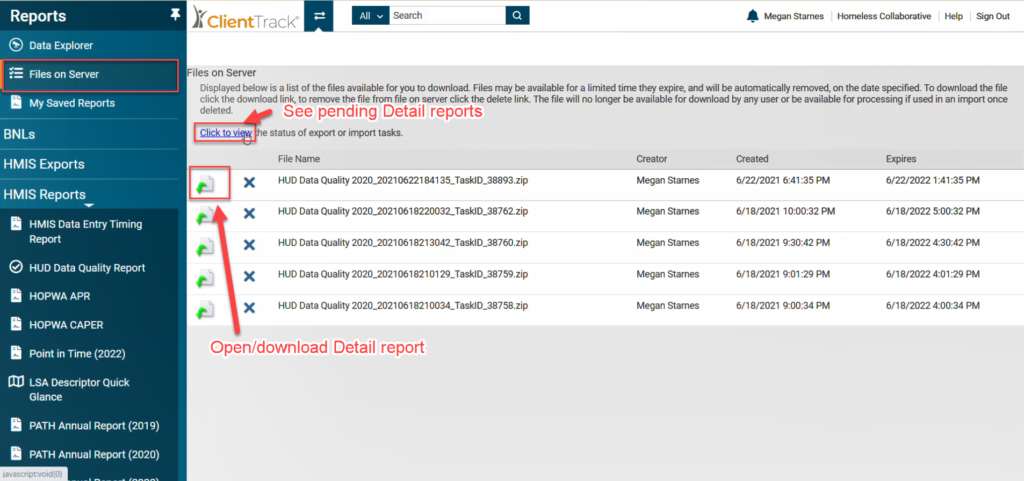
9. If you need the Detail Report containing all of the data used to compile the PIT Report (summary), check the Detail Report box. If you do not need this detail file, leave this box blank. This detail report can take up to an hour to run, so scheduling the report and coming back once it is complete can be helpful if you do need the detail file.
Running the Report #
The report can be run in real time or can be scheduled for a time in the future. Choose the option below that best meets your needs.
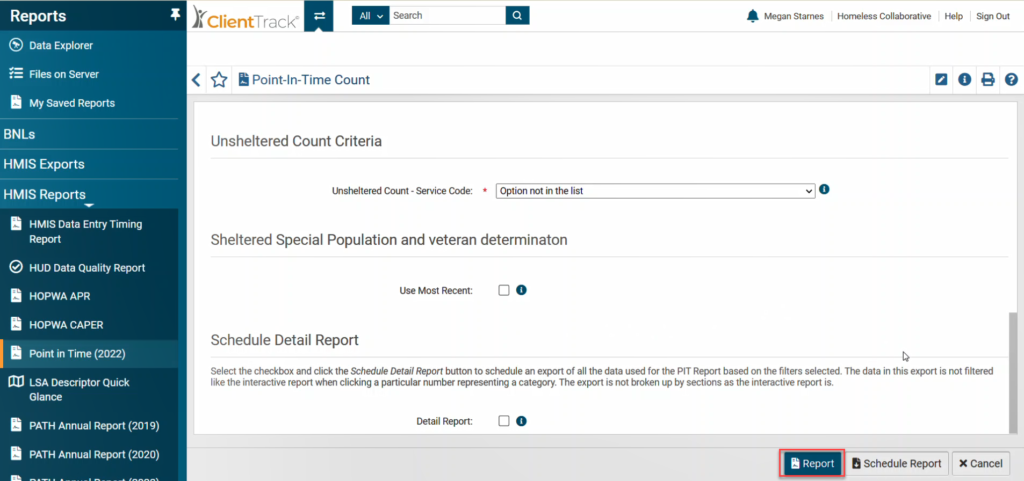
Run Report in Real Time
1. After completing the report settings from the previous section, click Report. A new window will open inside the Reports Workspace, and may take several minutes to load.
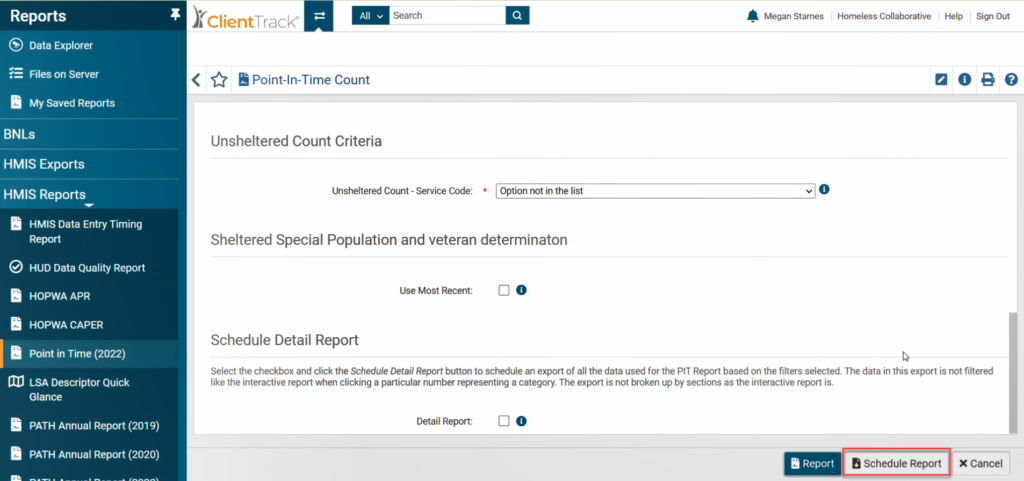
Scheduling the Report
1. After completing the report settings from the previous section, click Schedule Report.
2. Set the Report Date, Time and Format according to your needs, then click Schedule Report in the bottom corner of the window.
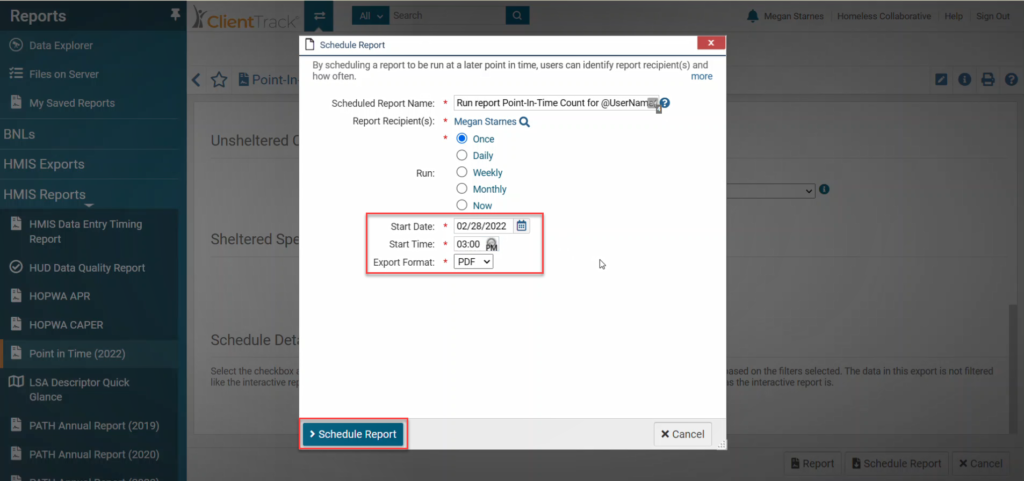
3. Click My Saved Reports to view the summary report once it is complete. If you do not see the report on this page, you can click the Scheduled Reports button to see reports you have scheduled for a future time.
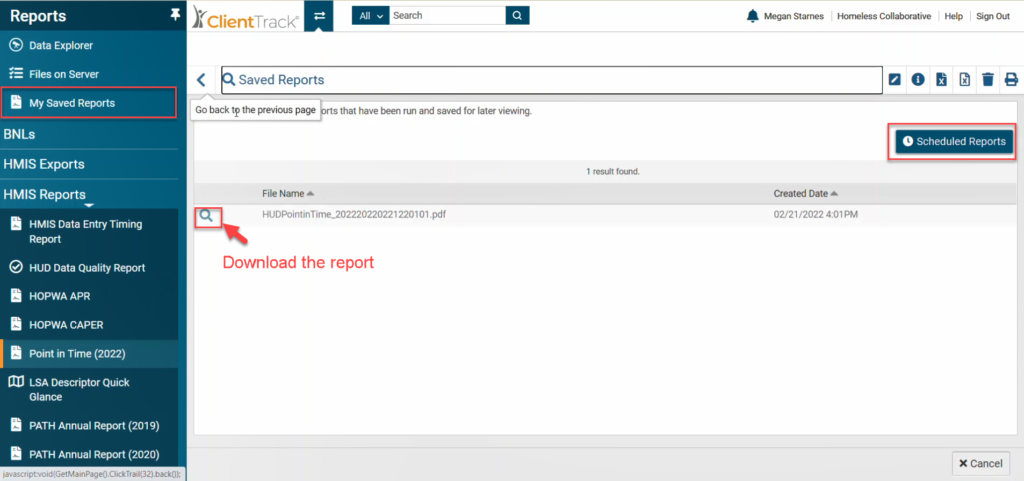
If you scheduled a Detail Report, you will find the Detail Report in the Files on Server page.
Viewing and Saving the Report #
1. Once you open the report, you can view the report inside ClientTrack by navigating through the report pages.
2. Save the report in any desired format using the Save options.
