Introduction
This document will show how to add a service to multiple clients using a scanner.
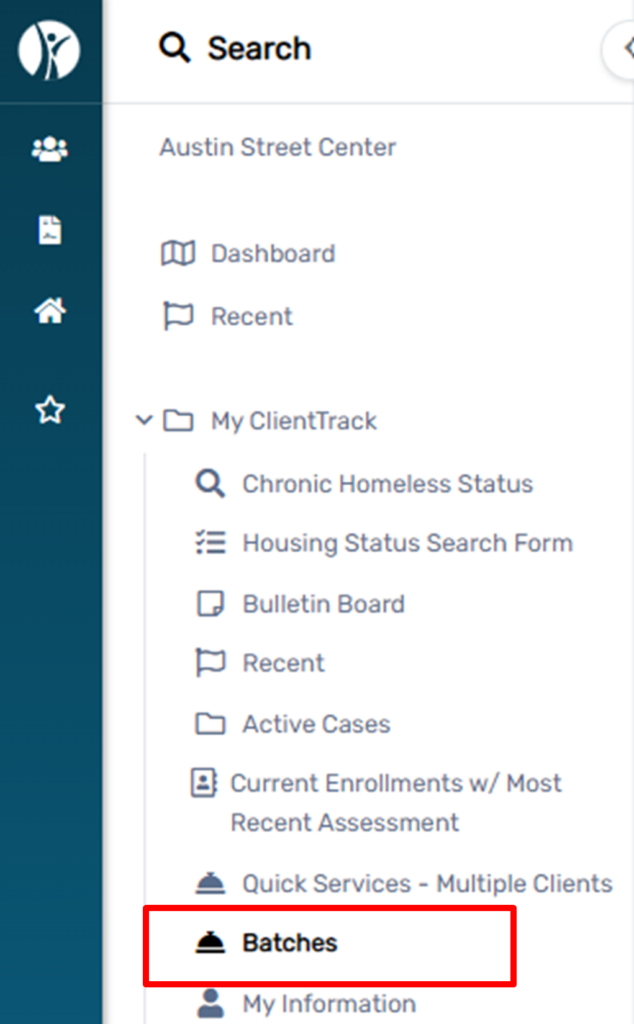
2. On the Home Workspace, select My Client Track, then Batches.
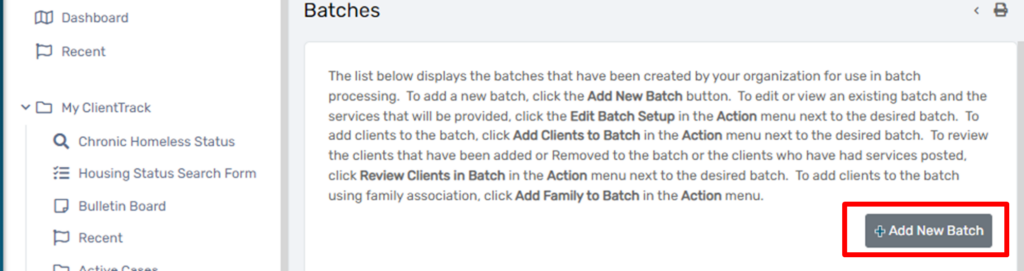
3. On the right side of the screen, select Add New Batch.
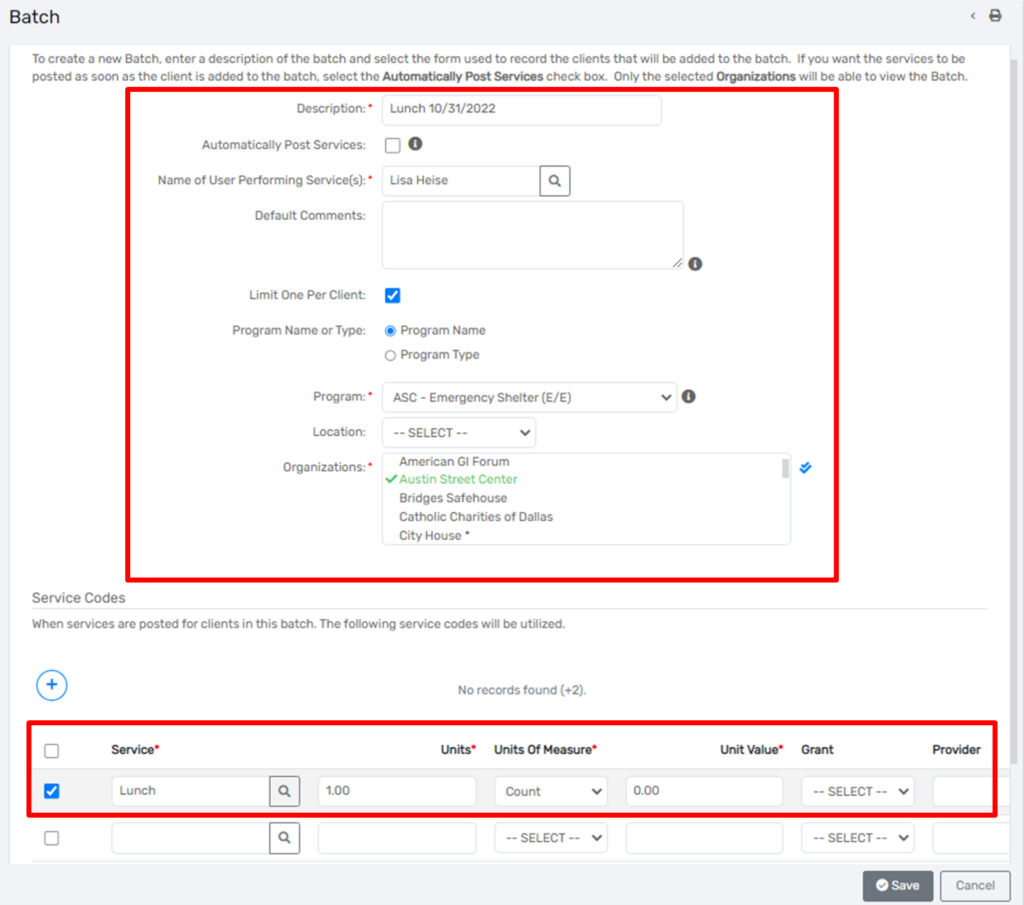
4. On the Batch set up, provide the following, bold entries are required, and select save:
5. Choose the Batch and select Add Clients to Batch.
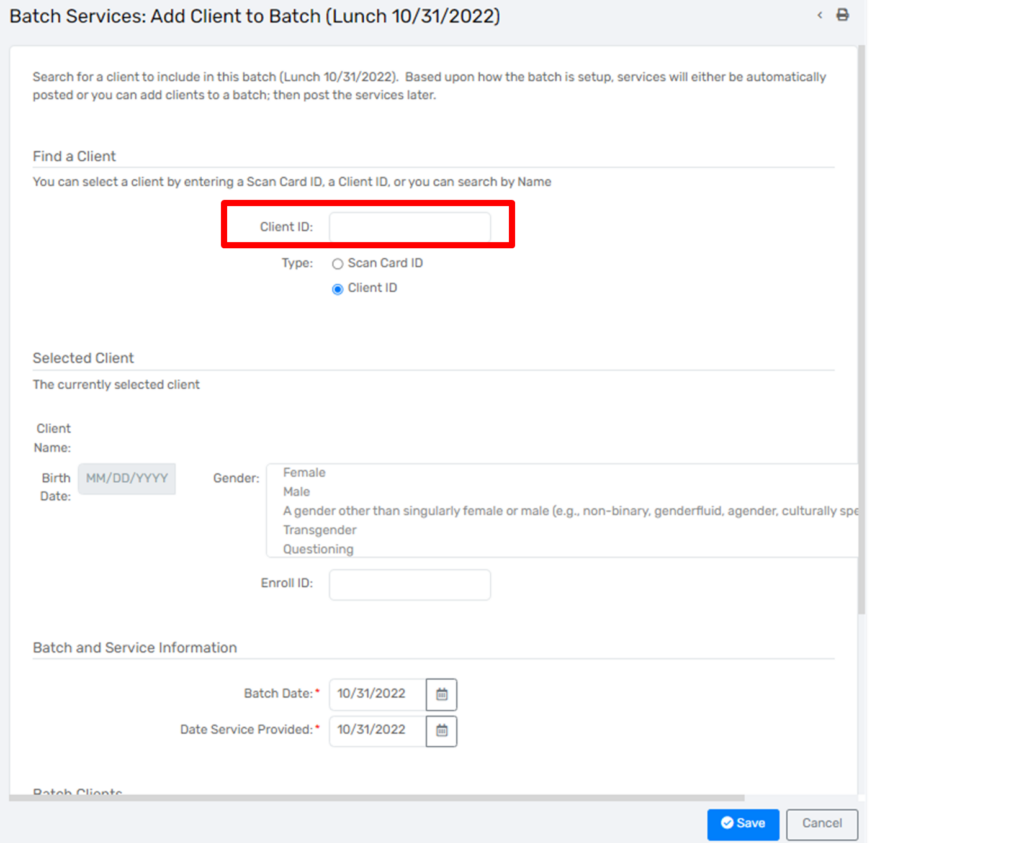
6. This screen will appear in which one would add the client information. Position your cursor in the Client ID field and scan the client’s card, then hit enter.
7. Scroll down to the Batch Clients section to see all the services that have been scanned.
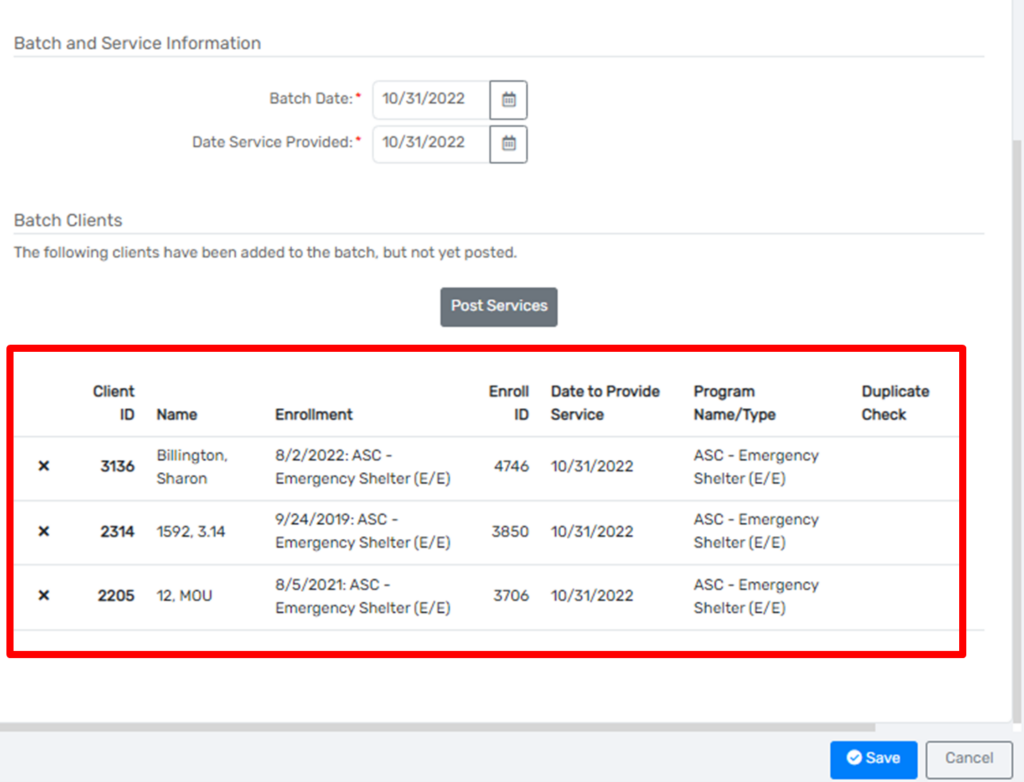
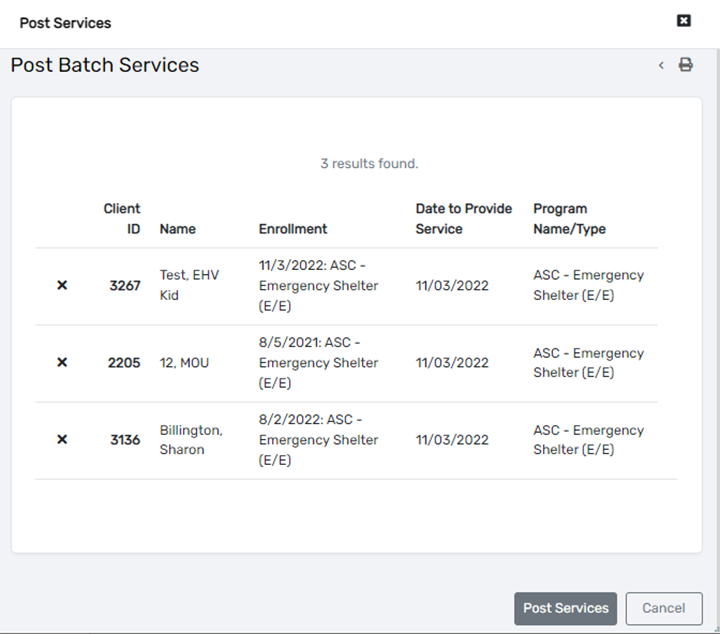
8. Once all the services have been added and reviewed, select Post Services.
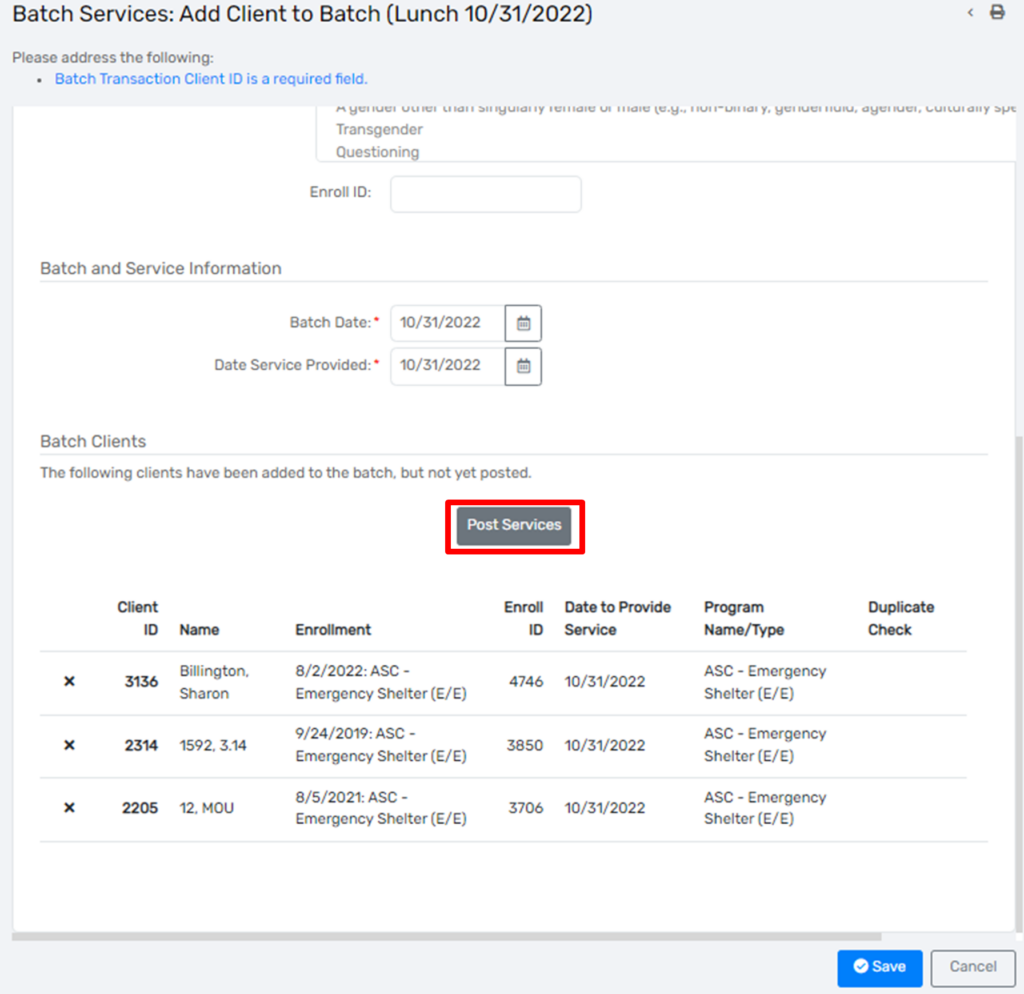
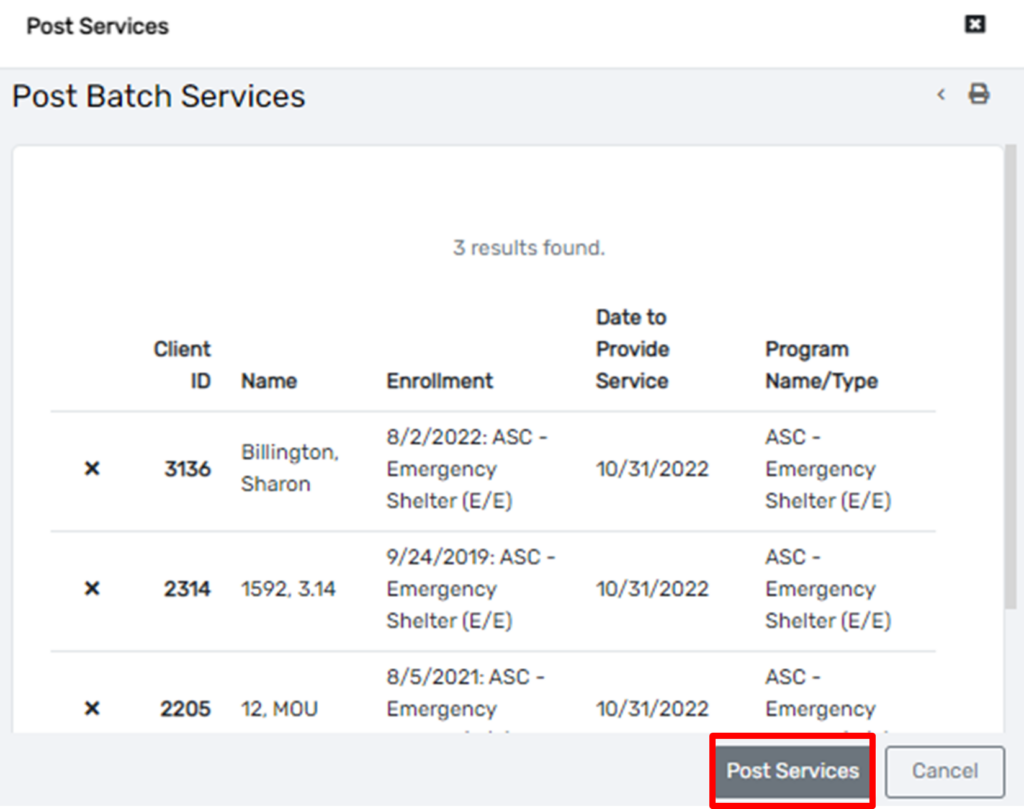
9. On the new window that appears, select Post Services.
When reviewing the batch, you may come across the following situations:
No Open Enrollment (the client is not enrolled in the program) or Duplicate
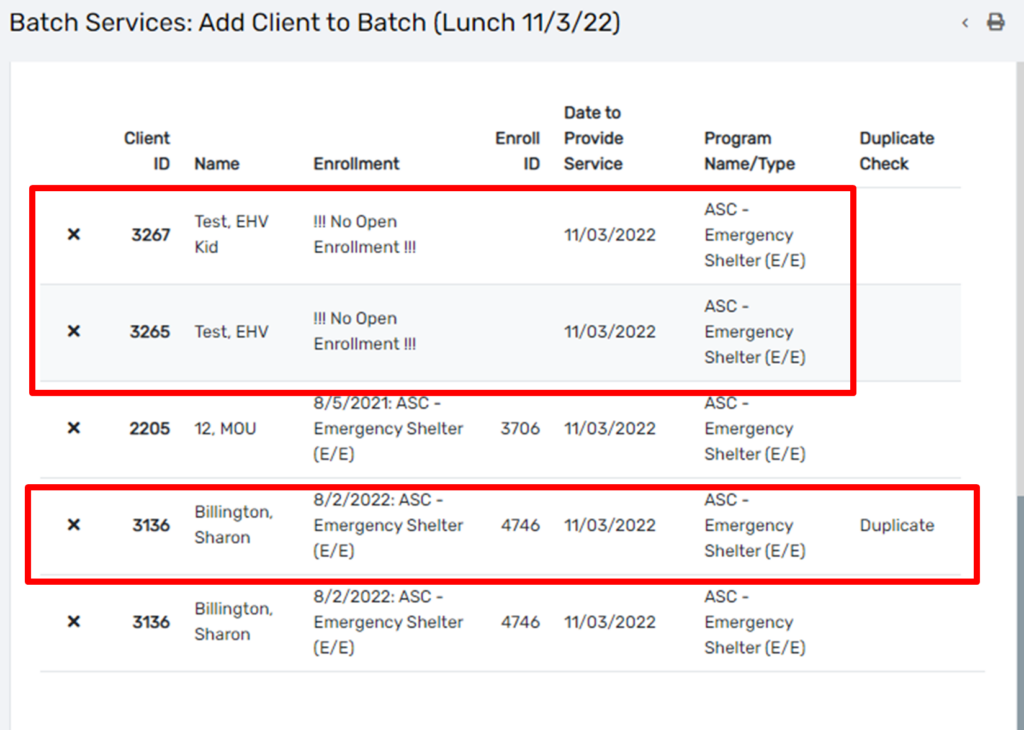
For the No Enrollment issue, you may enroll the client and reload the batch, or delete the entry by selecting the X on the left.
For the Duplicate issue, select the X on left to remove the entry.
After deleting one of the No Enrollments and the Duplicate, below is the posting services screen.
You can use the Quick Services – Multiple Clients feature when you are recording a service with the following criteria:
1. Navigate to your Home Workspace

2. In the menu, select Quick Services – Multiple Clients.

3. Complete the required fields:

4. Scroll down and check the box next to each client who received the service on this service date.

Note: If you do not see a client here, they do not have an active enrollment in your program. A service must be attached to an enrollment in HMIS, so you will need to enroll your client before recording this service for them.
5. Click Save and Close. You may want to go spot-check 1 or 2 client records to confirm the service was correctly recorded.
Download document:


2. Navigate to your Home Workspace, click My ClientTrack and then select My Services from the menu.

You will be taken to the My Services page where you can filter by Client ID, Service, and Service Date. By default, search results will be limited to services recorded today.
3. Enter the information needed to find the service you are needing to delete. Click Search

After clicking Search, you’ll see a list of services that match your search criteria. Each record displays Enrollment Program and Enrollment date associated with the service, Client ID, Service, and Service Date.
4. To delete a service record, click the “x” to the left of the service record.

5. You’ll then see a pop-up asking you “Delete Service Record?”. Click “Yes” to confirm.

1. Navigate to your Clients Workspace and find your client in the system
2. On the client’s Dashboard,
a) Scroll down to confirm that your client has an active enrollment in your program for the date the service will be recorded.
b) In the Services section, click [Client’s] Services

3. The Services page displays all of the client’s services. Use the Add New Service button to record a new service for the client.

4.On the New Service page, select the enrollment this service will be tied to. All services must be tied to an enrollment. Then complete the required fields:
a) Service: choose the service the client received
b) Date: defaults to today, update if backdating
c) Unit: number of these services the client received
d) Unite value: value of 1 of these services, if applicable
NOTE: This can be left at $0.00 if desired. Tracking the value of services in HMIS is part of agency data collection protocols and is not determined by HUD, the CoC, or the HMIS Team.

5. Click Save to record the service.
A clients’ recorded services can be seen on the Services page.

The client’s Dashboard will also display a list of the most recent services recorded.

Incorrectly recorded services must be deleted by an HMIS Admin. To request that a service be deleted, please submit a Spiceworks help desk ticket.
Download document:
