Thanks for your patience while we get this content on the webpage. Until then, download the document below to view it on your device!
Download document:

Case-Manager-Assignment-Cheat-Sheet.pdf
Every HMIS user in ClientTrack is assigned “Case Manager” access, regardless of their role or job title at their agency. The assigned case manager inside ClientTrack is the HMIS user assigned to that client’s enrollment in a given program. A client can have multiple case managers assigned to their enrollment(s).
The case manager is automatically assigned to the HMIS user completing the intake (entry/enrollment) assessment for a client.
Locate the neighbor using Find Client, once on the client’s dashboard select Profile and then Case Managers.
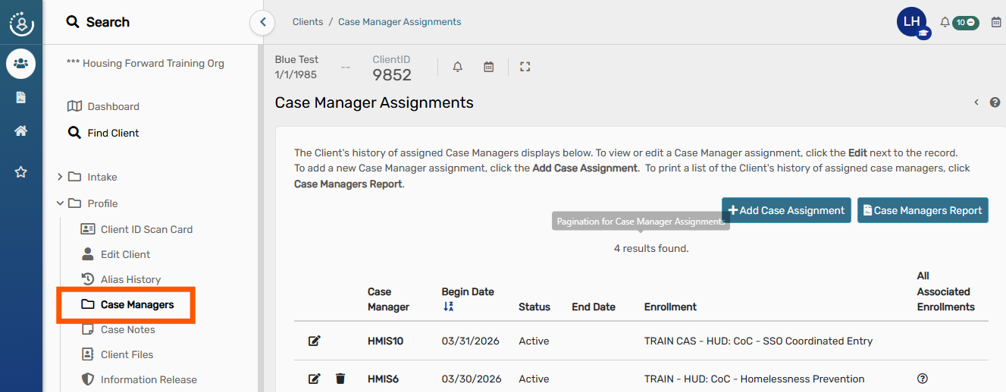
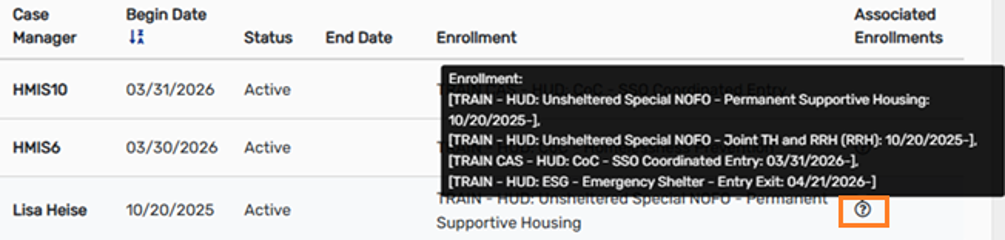
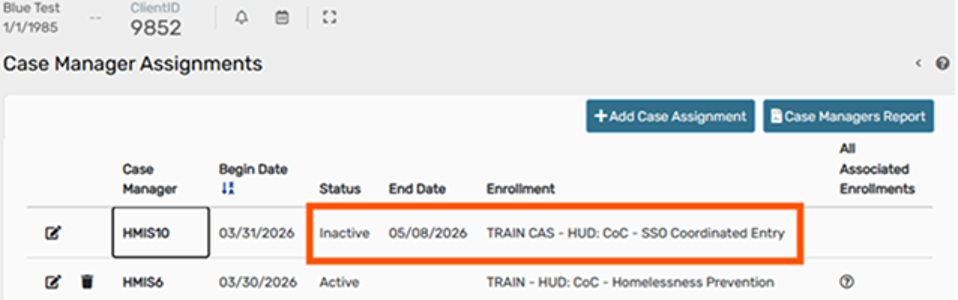
Case manager assignments are grouped.
By hovering over the question mark, one can see all the active assignments.
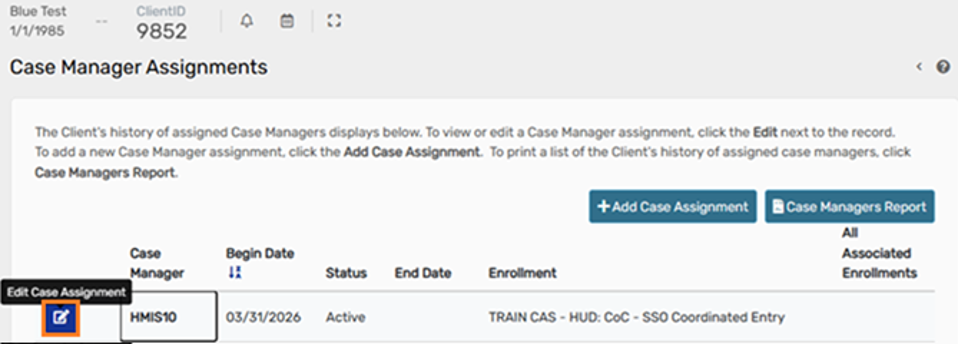
On the Case Manager Assignments page, select “Edit Case Assignment” next to the previous case manager for the enrollment.
Add an End Date for the assignment, and set the Status to “Inactive”
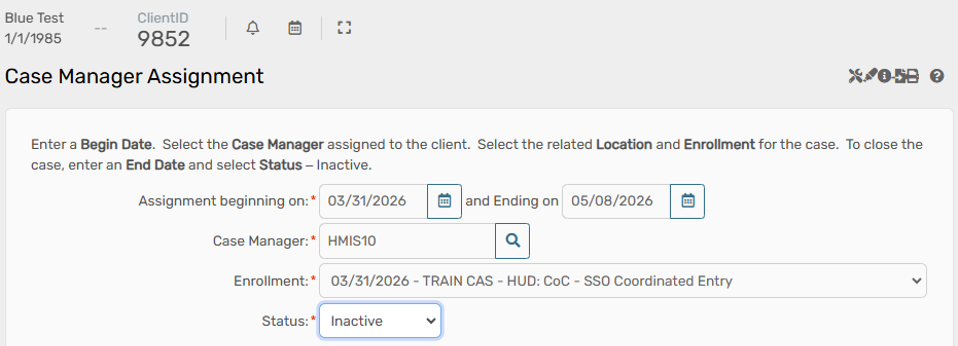
Now the assignment shows that the case manager is inactive on the date selected.
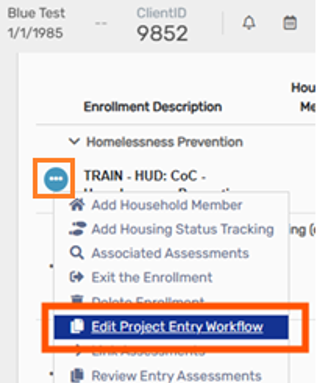
On the neighbor’s dashboard under the Enrollments section, locate the enrollment for your project, edit the project entry workflow via the three dots.
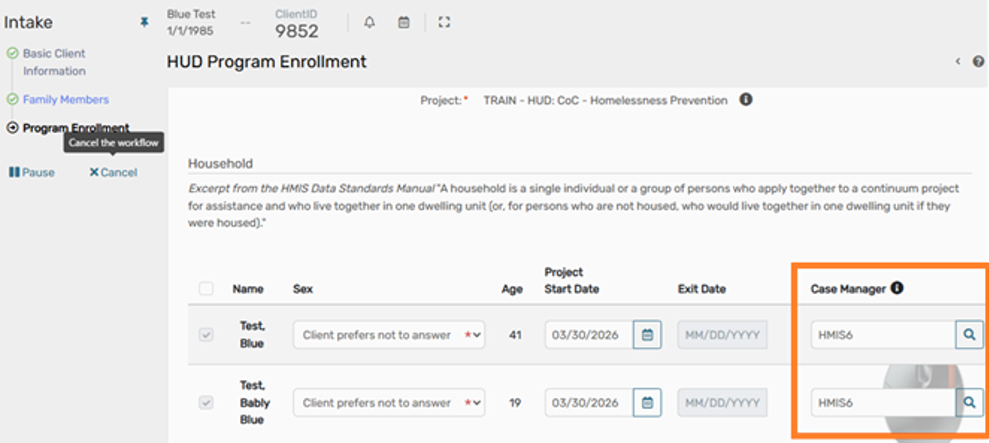
Continue through the workflow to the HUD Program Enrollment page and select the search button for the Case Manager assignment(s) you wish to change.
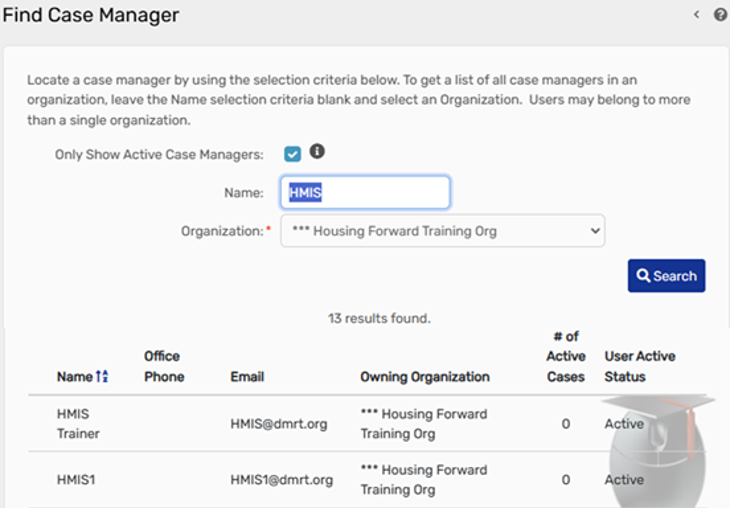
Search for the Case Manager by inputting their name.
Select the Case Manager you wish to assign to the enrollment.
Once the new Case Manager is selected, you will see the update on the HUD Program Enrollment page.
Select “Save” and continue through the workflow.

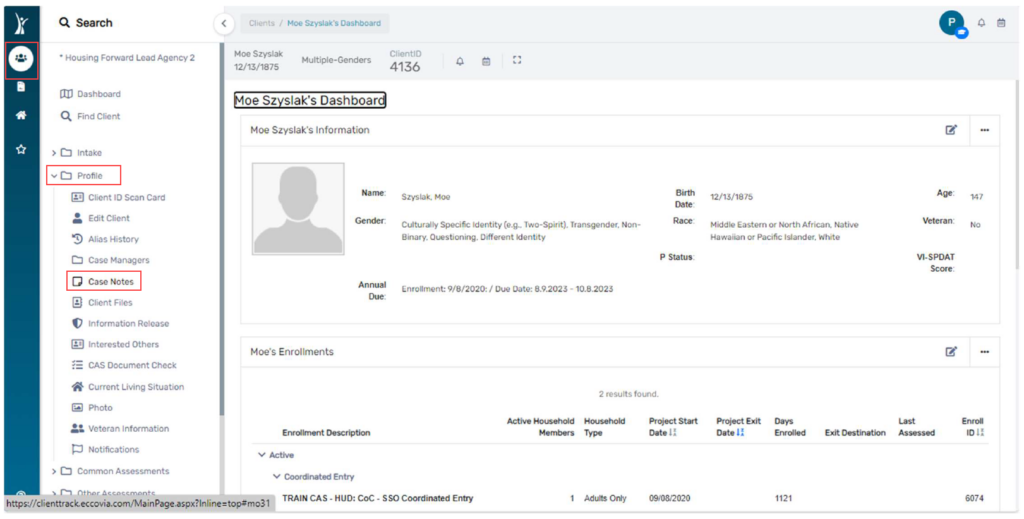
1. Begin on your Client Workspace and find the client you would like to record the Case Note for in the system.
2. From the Clients workspace, Select Profile from the menu on the left and then Case Notes from the submenu:
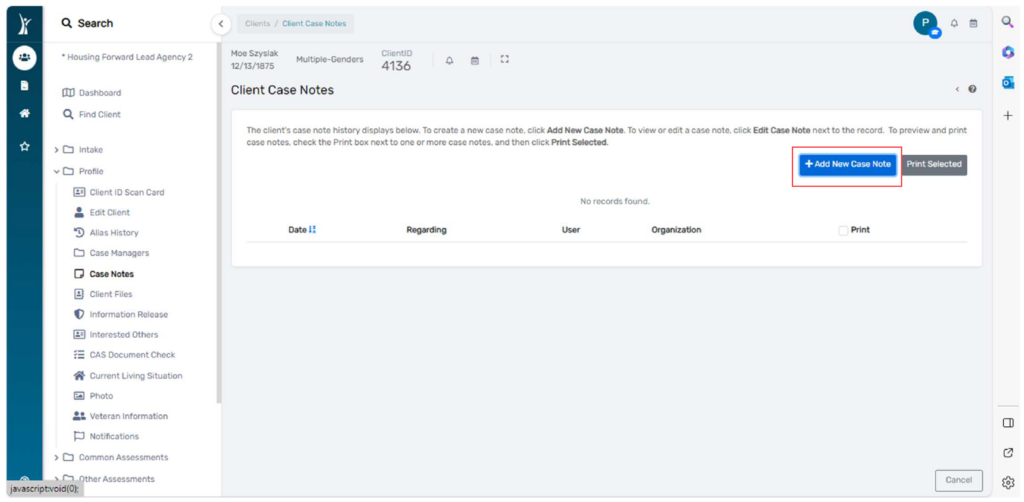
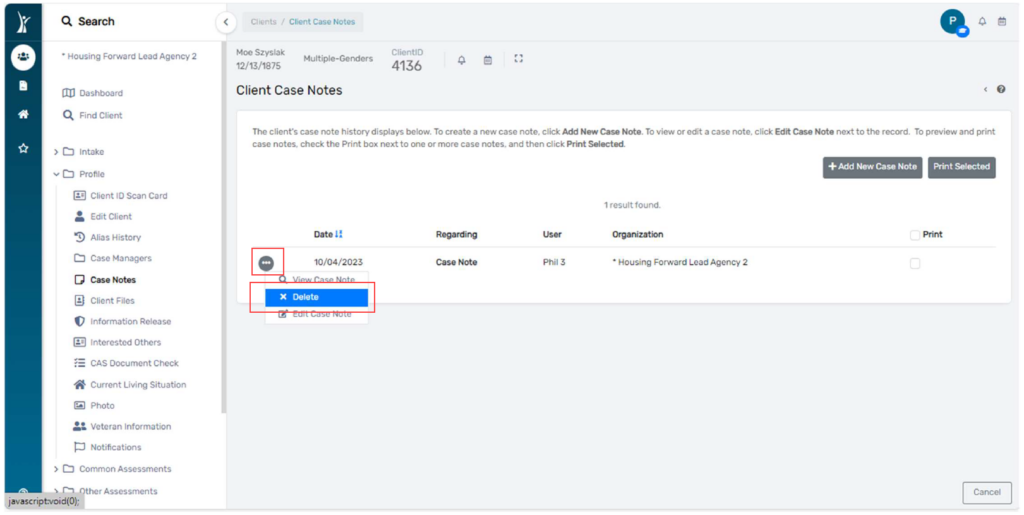
3. On the Case Notes page, click the Add New Case Note button.
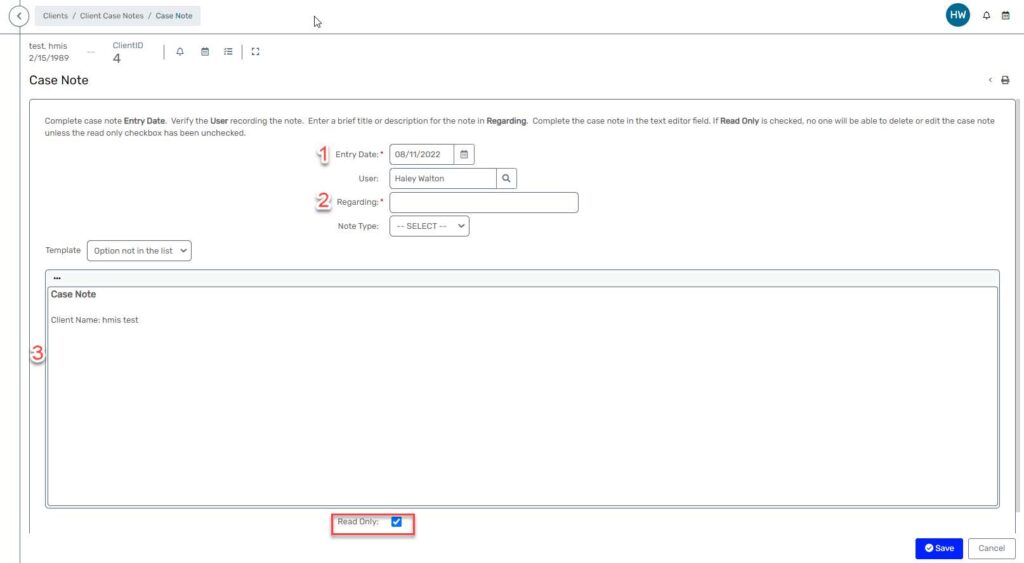
4. Enter a date (1) and a title (2) for the case note. Record your case note (3). Be sure to check the Read Only box (4) to make the case note printable and unable to be edited by others. If a case note should be removed, be sure to uncheck the “Read Only” box.
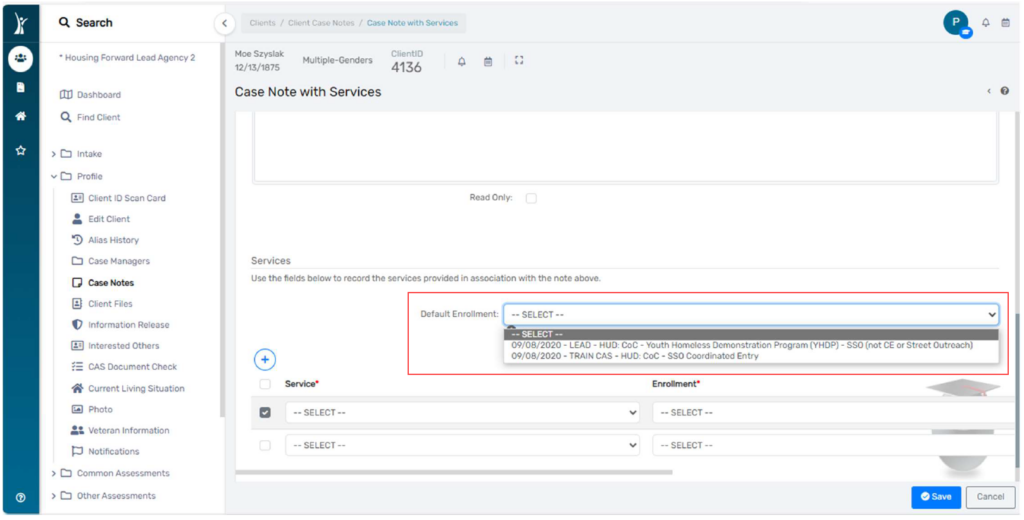
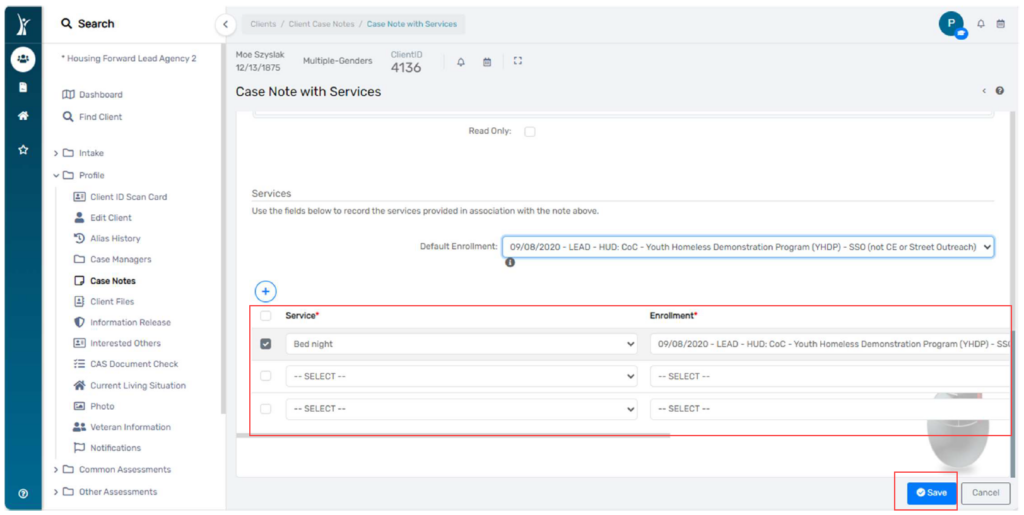
5. Enter service information and the enrollment to which you’d like this case note to
attach. If you want to default the enrollment fields to a specific enrollment, select that enrollment in the Default Enrollment field before adding service information:
6. Select your services from the drop-down fields below. Click Save when you are done:
2. In the pop-up window, select from the drop-down “Delete” and click Save.
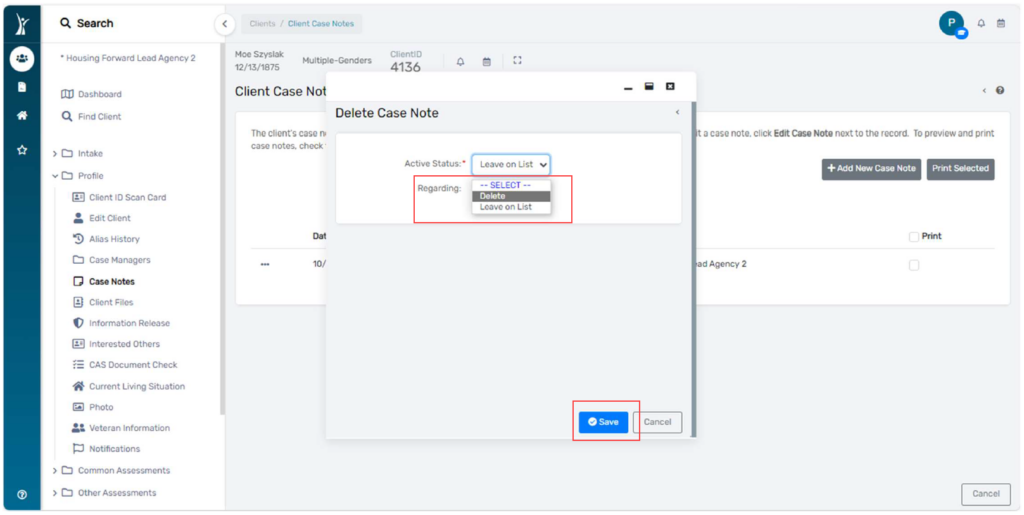
3. Click the “x” at the top right to close this pop-up window:

The Client Files feature functions as a system-wide digital file cabinet for items related to an individual client. Documents saved on the Client Files feature are shared in the same way as enrollment records, meaning other organizations will be able to access files you place on the client’s record using Client Files.
It can be extremely helpful to our clients to upload identification documents to Client Files. It is hard to keep track of these documents and they are required for several types of services and interventions. Using ClientTrack to help clients manage their documents is an easy way for us to take advantage of the system to provide additional support to our neighbors!
NOTE: NEVER upload CAS documentation to Client Files, especially verification of disability or any document containing HIPAA sensitive information, such as a diagnosis. Use Document Check for these types of documents and file.
1. Log in to ClientTrack and navigate to your Clients Workspace.

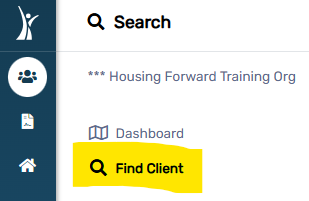
2. Find your client by searching using their name or client ID.
![]()
3. On the Favorites Menu, under Profile, select Client Files.

4. The Client Files page displays all files currently uploaded for this client. Use the Add File button to upload a new file. If you prefer, you can use the Grid view to view the documents in a list format and sort them using the filters on the screen.

5. Click Choose File to select a file from your computer to upload into HMIS. The Document Name will default to the same of the file you select, but you may change it by typing in a new Document Name. When you are ready, click Save.

You can use these steps to edit a client’s basic information that appears at the top of their Client Dashboard and their identifying information such as date of birth or SSN.
Use these steps to add or correct information such as:
Do NOT use this page to correct Relationship to Head of Household or Veteran Status. Although these fields are editable from this page, this data is directly tied to program enrollments and should be edited from a workflow to avoid errors and ensure all of the required data for Head of Households and Family Members is collected.
1. Navigate to your Clients Workspace.

2. Find your client using the Search or Find Client.
3. From your client’s Dashboard, click the edit button in the Client Information section.

OR
In the workspace menu, click Profile then Edit Client.

4. Make the necessary edits to the client’s information, then click Finish to save the page.

Interested Others: Others who might have an interest in the client’s situation.?
A client would add this information to their account to keep someone in the loop on their status.

3. Select “Add New Interested Other”

4. Add Type/Description of Interested Other

Relationship of Interested Other to Client and if they are aware of the client’s situation is not required


6. Add Contact Information for the Interested Other

7. Click “Save“

To Edit the information, select the Edit button on the far left of the name:

This document will show the steps in creating a client user in HMIS (Client Track).
1. Search for the Client
2. Search by name
Enter ONLY the first 2-3 letters of the client’s first name and the first three letters of the client’s last name. This will search the system to see if the client has an existing HMIS record.
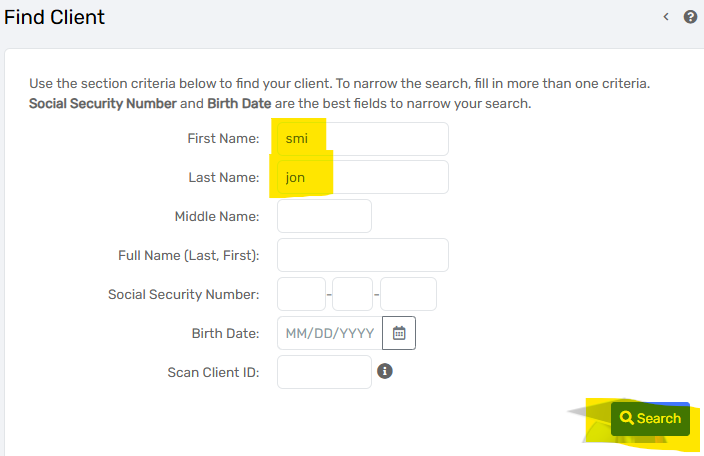
If no clients are found with that combination, the system will display “No records found.”

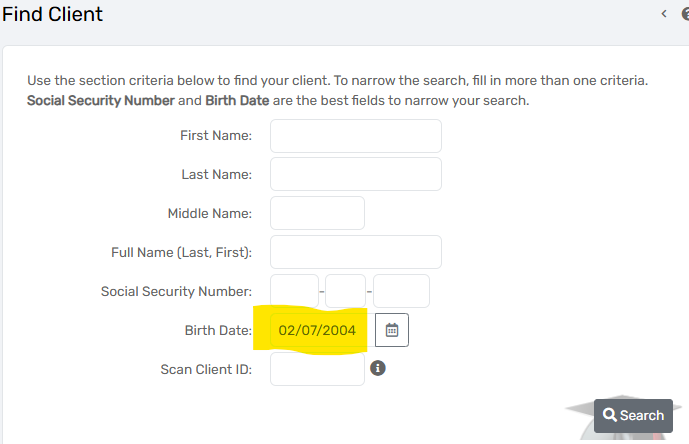
3. If a client isn’t found by searching for name, search by birthday or SSN.
The client was found with their DOB, with a very similar name:
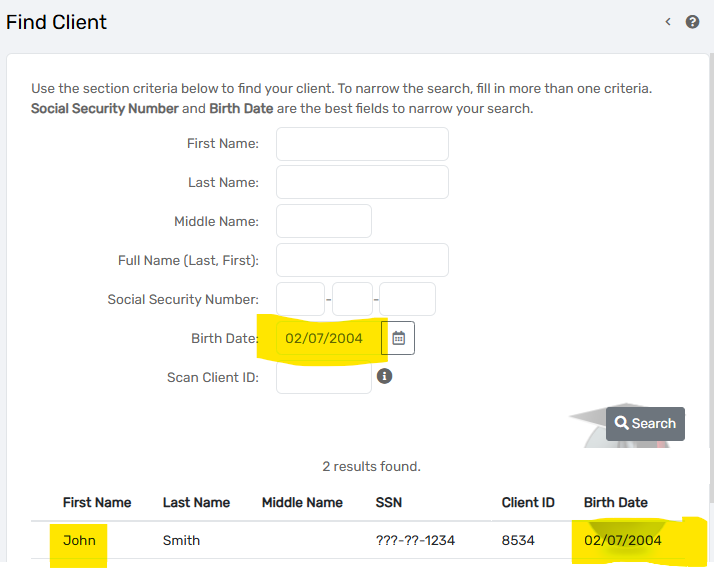
If you find duplicates, please submit a Spiceworks ticket by sending an email to help@housingforward.on.spiceworks.com with both client IDs.
If the client information is not the same, please determine which one is correct and edit the client information to match before submitting the merge of clients.


2. Notice that you have two options. You can either upload a photo by clicking “Choose File” or take a photo of the client by clicking on the camera icon.

1. Locate the file on your computer and upload it after clicking “Choose File”.
2. Click “Save”.

1. Allow ClientTrack to access your device’s camera if you have not already done so.
 2. Click the gray camera icon under the photo viewer to take a photo of your client.
3. You will have the options to “Use this image” or “Retake”. When you have a photo that you would like to use, click “Use this image”.
4. Click “Save“.
Once a client’s photo is saved, selecting “Client Photo” and then clicking the client’s photo gain will allow you to download it. Remove a photo using the “Remove Photo” button or upload a new photo using the steps listed in this cheat sheet.
Download document: