
This document was developed by the HMIS Committee for our community to determine how we will approach Data Quality. You can view the document below or download it for your own reference.

2. Under the “HMIS Reports” dropdown, select “HMIS Data Entry Timing Report”

3. On the reporting screen: select Date Range, Type, Organization, and Program(s)


Note: The “Programs” field is multi-select!
4. Once the required information is captured, select “Report“

If the reports are running in the background, you’ll see the notifications below.


5. When the report is ready, you will see something like the one below. By clicking on the plus signs, you will be able to see client-level data.

6. To save the report, select the “Save” icon and choose “Excel“. This will save the report in the same formatting you are seeing it in ClientTrack!

Data Quality Monitoring takes place on a quarterly basis. The submission form opens on the first day of the month following the end of each quarter and remains open for the entirety of that month to allow time for data clean up.
Data Quality Officers run a series of reports that provide them with a full picture of their organization’s data quality. Reports are always run from the first of the year through the end of the preceding quarter. They then resolve any data clean up issues that they can before submitting their reports and answering a few questions on the submission form. Detailed instructions for each report can be found in the HMIS Quarterly Reporting Submission Guide.
Data Quality Office Hours are held on the second Tuesday following the end of the quarter at 10:00am. During these office hours, we discuss any changes to the submission process for that quarter, as well as provide technical assistance and answer questions from DQOs.
Reporting Schedule:
| End of Quarter | Submission Opens | DQO Office Hours | Submission Closes |
| March 31 | April 1 | 2nd Tuesday of April | April 30 |
| June 30 | July 1 | 2nd Tuesday of July | July 31 |
| September 30 | October 1 | 2nd Tuesday of Oct. | October 31 |
| December 31 | January 1 | 2nd Tuesday of Jan. | January 31 |
If you are the designated Data Quality Officer for your organization and you have access to ClientTrack, you can access the DQO Workgroup by opening your Account Settings and choosing the following:
This workgroup will give you access to the following additional features. Scroll down this page to learn more about each one.
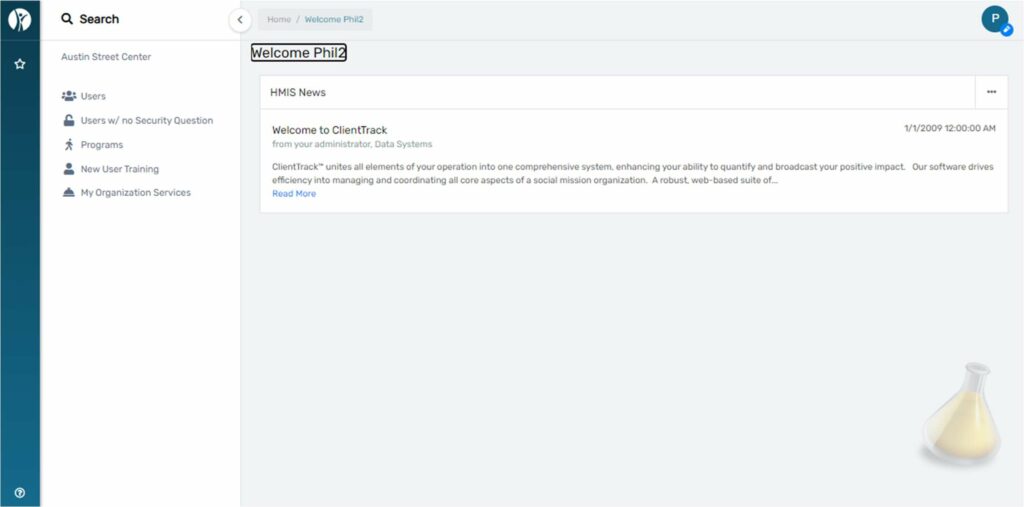
The dashboard of the DQO workgroup shows HMIS News. Check here for updates from your HMIS Admins:
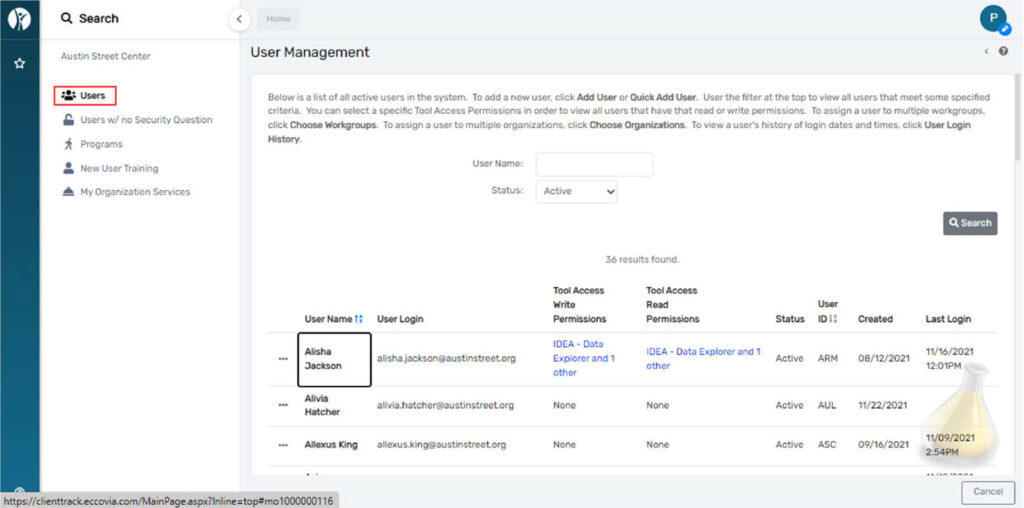
The Users page shows all users for your organization. You can filter by Active, Inactive, and Pending:
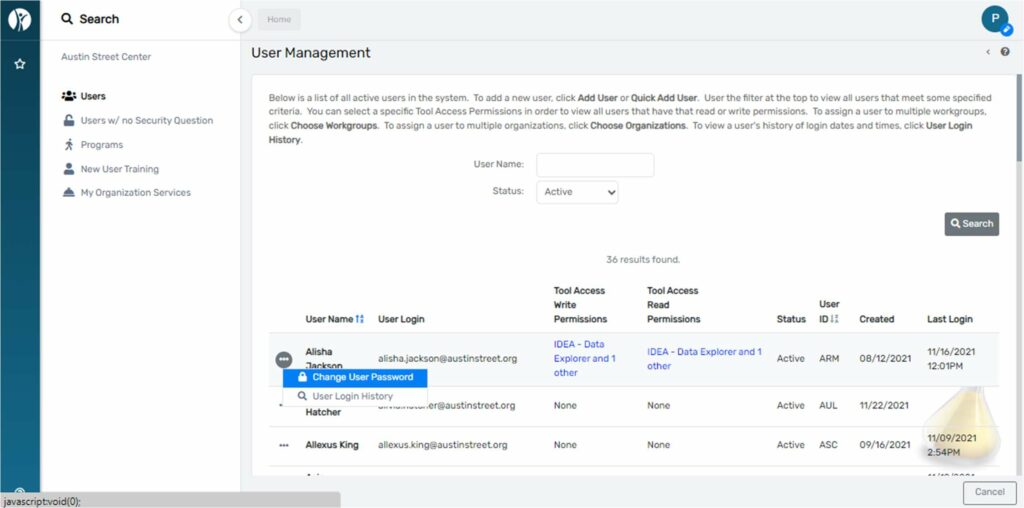
The action button to the left of each user will give you options to see user login history and update the user’s password:
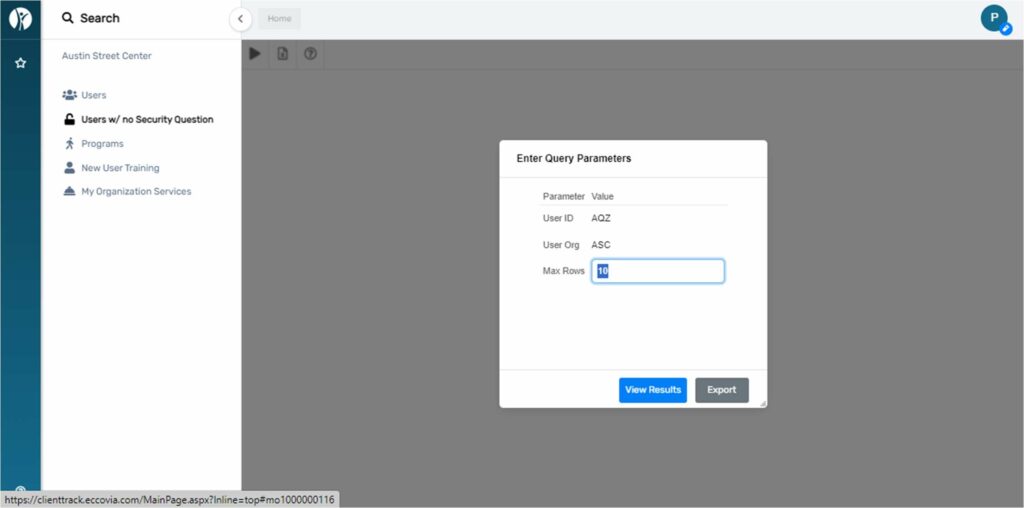
The Users w/ no Security Question page will populate a query that shows all users within your org who have not set their security question:
Programs will show by default all active HMIS programs in your organization. You can also see all programs regardless of active status and all programs regardless of their participation in HMIS :
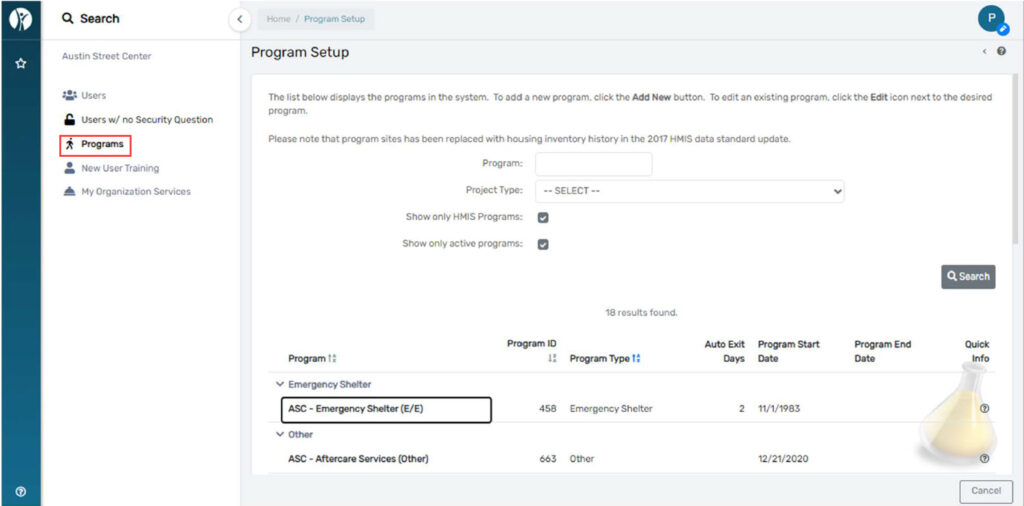
Please notify us if any programs listed under the active list should be ended.
My Organization Services will list services created by your organization. You can filter by Client ID, Service,
Service Date, and the user who created the service:
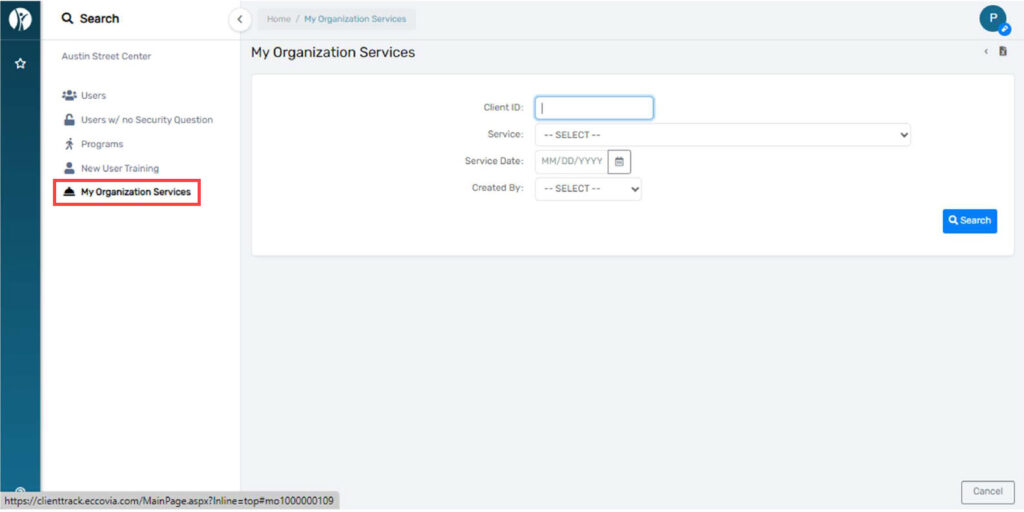
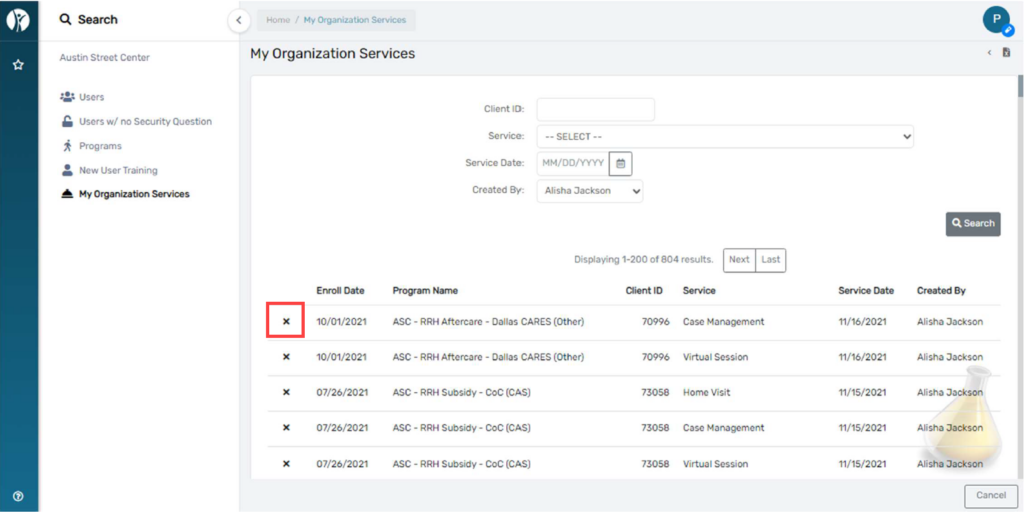
Filtering only by user will list all services created by the user. Click the “X” next to any service to delete it:
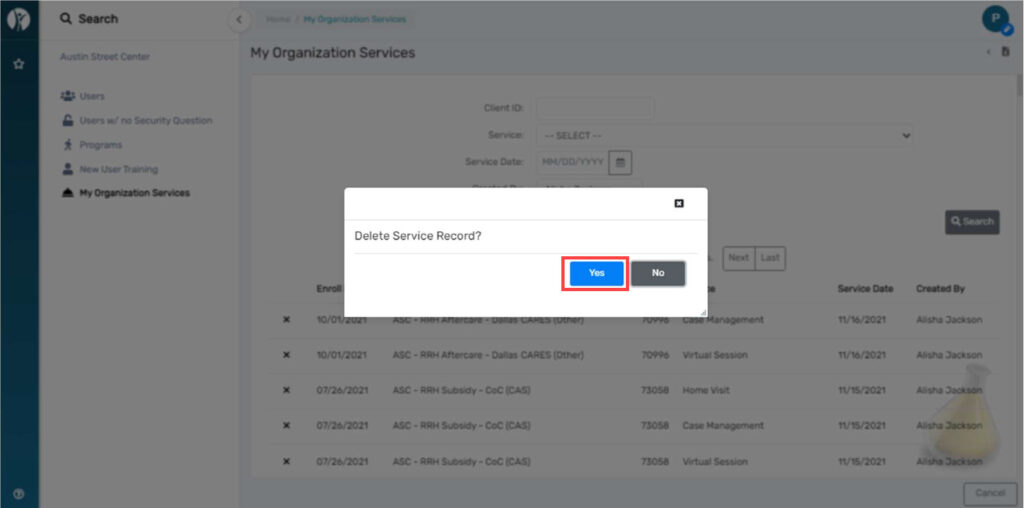
To confirm the deletion of the service click “yes” to confirm via the pop-up:
Paused Operations Report will show paused workflows for all users for your organization:
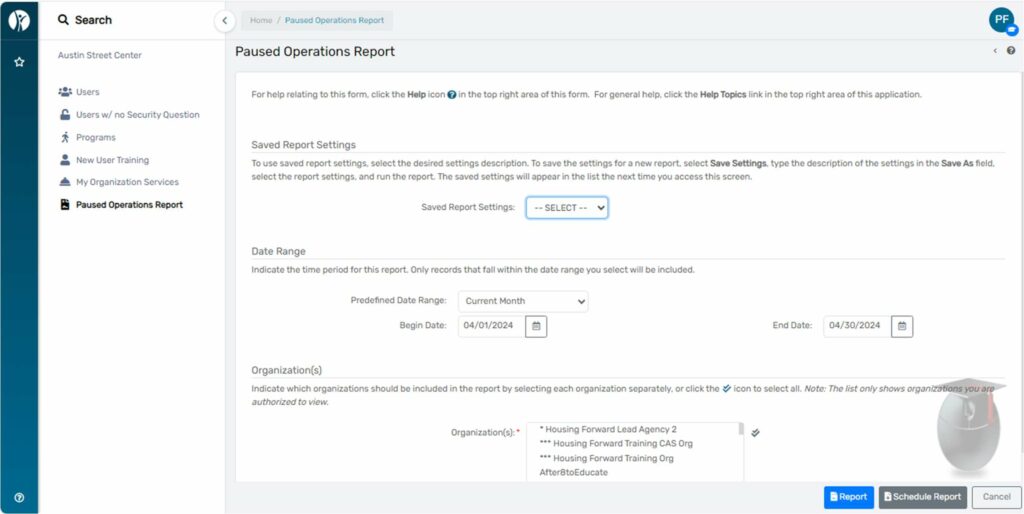
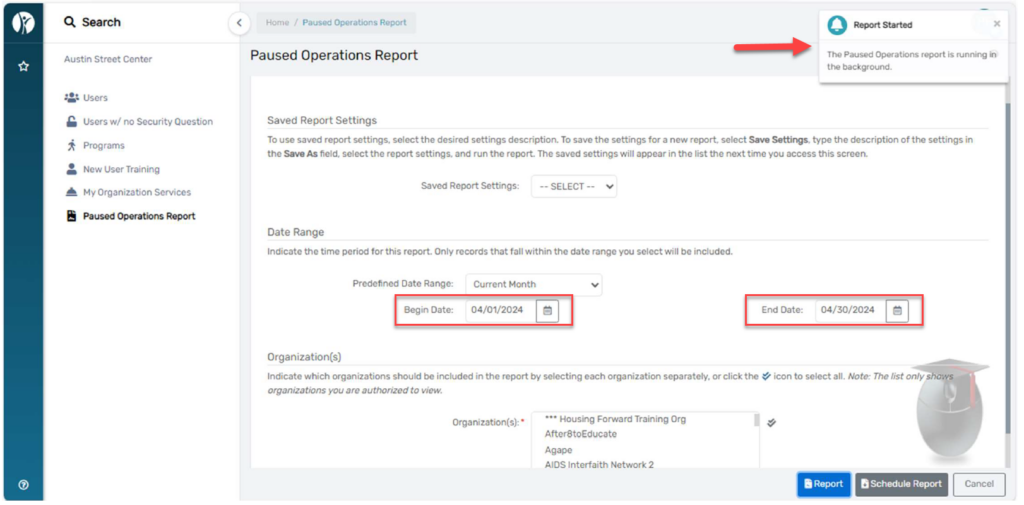
Enter your date range and click Report. You’ll see a notification on the top right of your screen that your
report is running:
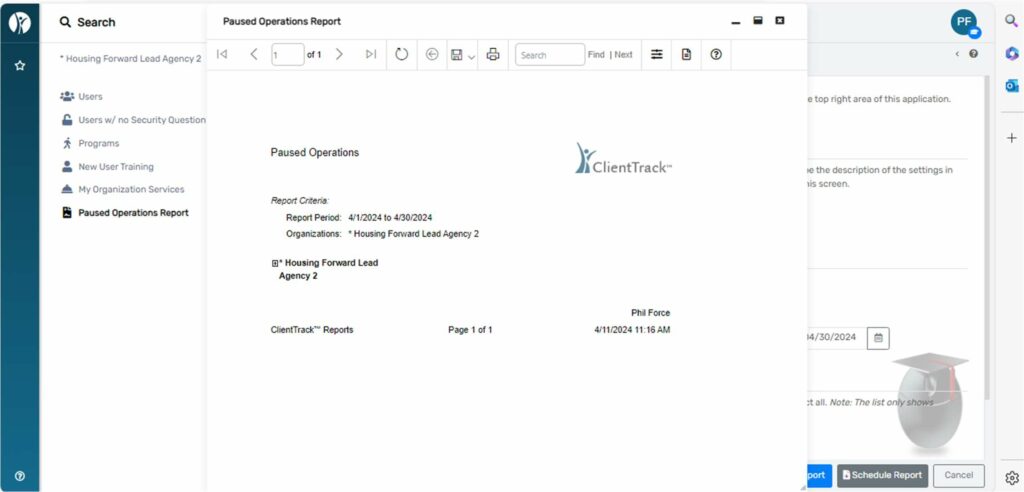
When this is done you will see a pop-up like the one below:
HMIS Quarterly Reporting Guide 9.21.26
Powered By EmbedPress
This report is a custom report that is built in Data Explorer which allows you to easily report on how often users at your agency are logging into ClientTrack.
The report will display the following data points:
• Active Status
• User ID
• User Name
• Email
• Organization Last Logged on to
• User Created Date
• Last Login Date
• Workgroup Last Logged in to
1. Log in to ClientTrack and navigate to your Reports Workspace.
2. In the menu, select Data Explorer.

3. Uncheck “Only show my questions”.

4. Search for “User Tracker” and select that query.

5. Under “Which records do you want to include?” change the organization to your agency.

6. Click “Show Me” then use the export button in the top right corner of the report to export your report.

Download document:
